
The Fireplace remodel project was the moment where I realized I wanted to share our Home DIY journey and hopefully, someday, be a source for others to learn from like I’ve learnt from so many others. Before I started my DIY Instagram page, we built our fireplace. It was the first project we built from scratch. I’ve always loved DIY projects but this particular project lit a passion that now burns very bright and I’m excited for this journey on IG and the community I’ve found.
How it started…
I’ve always wanted to remodel our fireplace but it always got pushed to the bottom of the list. Until one day we had a slab leak. The leak happened to be near the fireplace. To save our flooring, we removed the floorboards so they would dry and not get damaged by the moisture. It may have been excessive but I’m always nervous when it comes to dampness and mold. By removing the flooring we noticed that the wood trim around the right side of the fireplace was damp. So this gave me the perfect excuse and shove to tackle this project.

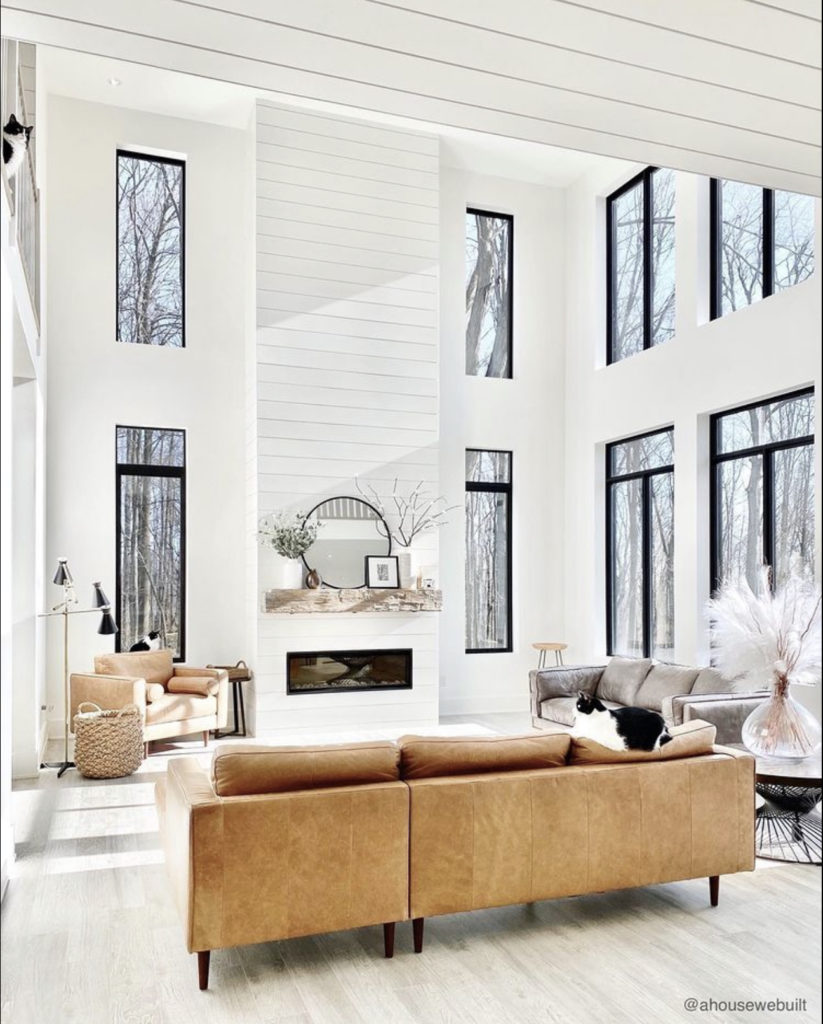
I had been saving fireplace inspiration pins on Pinterest since we bought the house but there was always one I’d go back to and it was from ‘A HOUSE WE BUILT‘. I don’t know if it was the high vaulted ceilings, the light, the perfect beveled shiplap, the rustic chunky mantle, or the decor in the room that hooked me. But I was adamant I had to have something similar. Speaking of shiplap, go check out my laundry room update here that includes a shiplap accent wall.
The plan…
So I set out to figure out how to accomplish it and one day while scrolling on Instagram I saw Reagan over at ‘THE BLOOMING NEST‘ had shared a few posts in her stories of people that had used her fireplace build tutorial to build a fireplace on a boring plain wall. I thought ‘how is this timing!’. I went back in her feed and fell in love with her shiplap fireplace. So I checked out her tutorial blog post and it was exactly what I needed to work up a plan to build the fireplace around my existing fireplace. Unfortunately, I didn’t have a plain wall to work with – that would have been easier. I had an existing fireplace that I wanted to build out and rework into something similar to what she had created.
We had never built anything from scratch before. The fireplace remodel was our first! There was definitely a list of tools we needed to acquire to make this project easier. For any beginner DIYer, these are a must in my opinion. They will change the game for you. I firmly believe if you have the correct tools, you can create anything. The tools were:
What had to be done to accomplish the fireplace remodel
- Remove trim and hearth
- Re-floor
- Build the structure
- Shiplap
- the problem we ran into and how we had to pivot
- Build and hang the mantle
Removal of trim and hearth
The technicalities
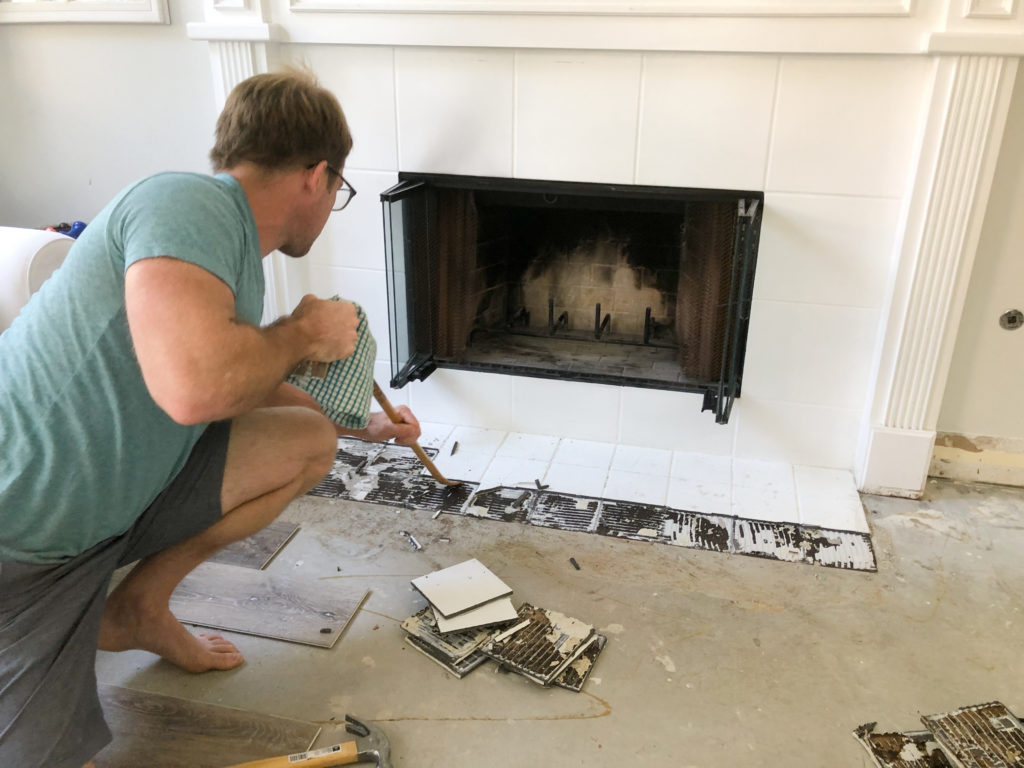
The trim around our fireplace was one piece so we had to carefully score the chalk and pry it off the wall, hoping not to rip the drywall off. Ideally, I wanted to remove the hearth and tile around the sides entirely for aesthetics but knew it may have to stay according to the code here in So-California. We did our research, called the city, and got the go-ahead from one of the head engineers that a hearth is not needed. Nor is the clearance around the sides, IF the fireplace is gas and has a chain curtain and/or glass doors.
Time to demo
We had a gas line for the fireplace but it hadn’t been hooked up since we moved in. We needed a gaslighter. Which was a simple purchase from home depot and easy installation. We had the green light from the city to go ahead and remove the hearth so we called a neighbor up and borrowed his crowbar and got to work pulling off the tiles. The tiles around the sides we left because I had a plan to build the structure around the tiles. I repaired the areas that the drywall was damaged from the removal with wall compound.
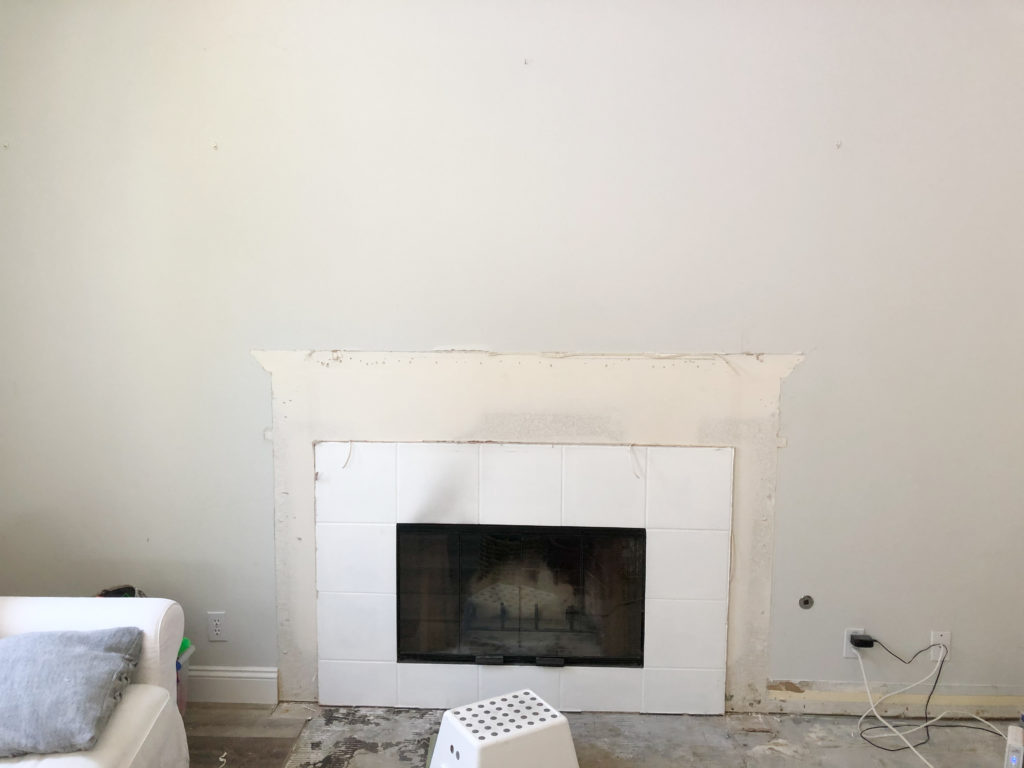
Reflooring
With the hearth gone and the slab leak fixed, we had quite the area to re-floor. We ran into a bit of a snag here because the flooring we had installed was discontinued. So one of my go-to pieces of advice when it comes to flooring is by extra boxes for future mishaps or remodels. Luckily, we called the manufacturer and they found one and a half lonely boxes of the discontinued flooring in their warehouse. We had to drive over an hour to get whatever we could find in whatever condition it was. It was either that or pay to re-floor the entire house. Thank goodness we found them! Reinstalling the floor wasn’t a hassle. We numbered the boards that we lifted so it wasn’t that difficult to put back. And without the hearth, re-flooring that area was a breeze to click into place.

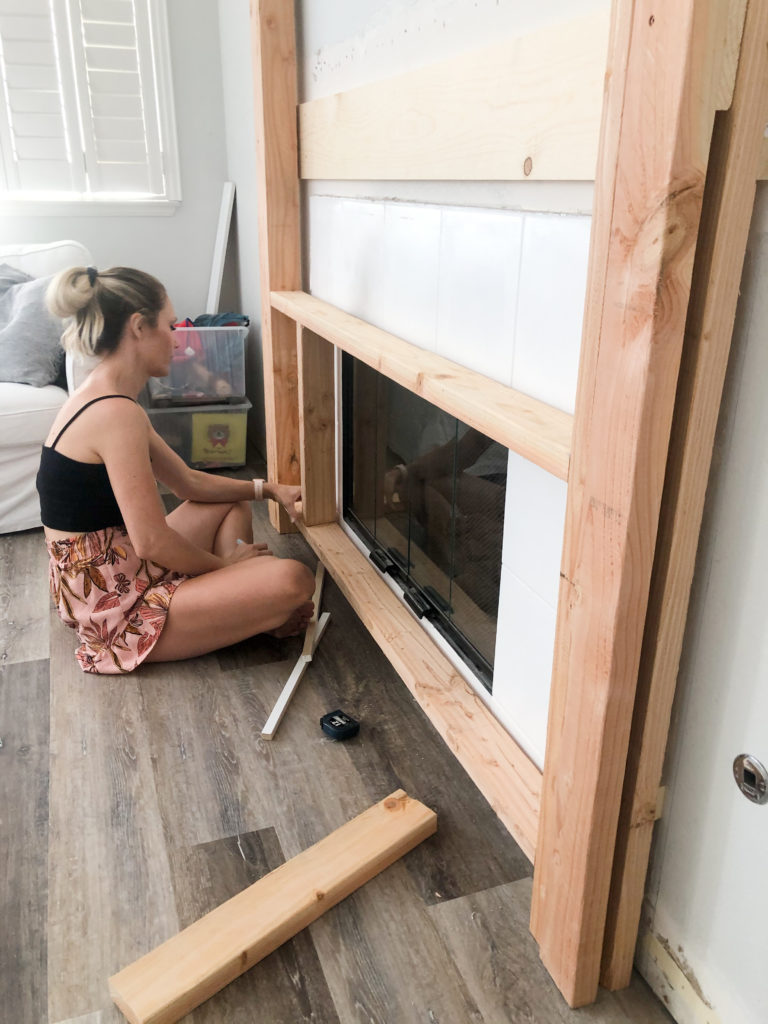
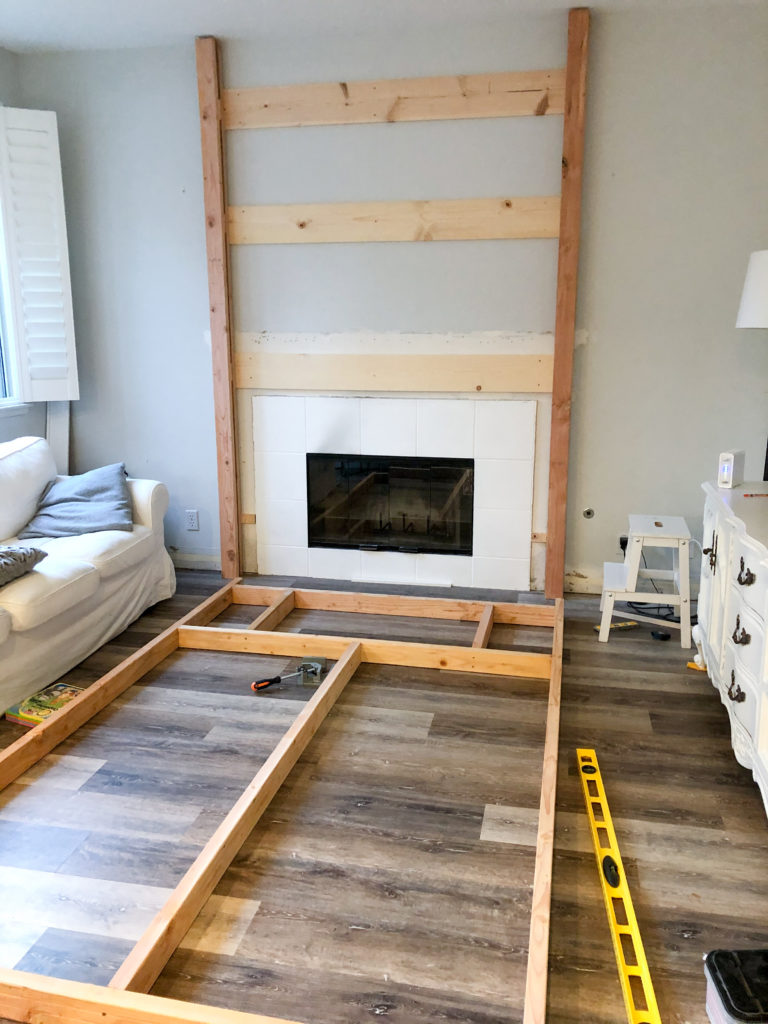
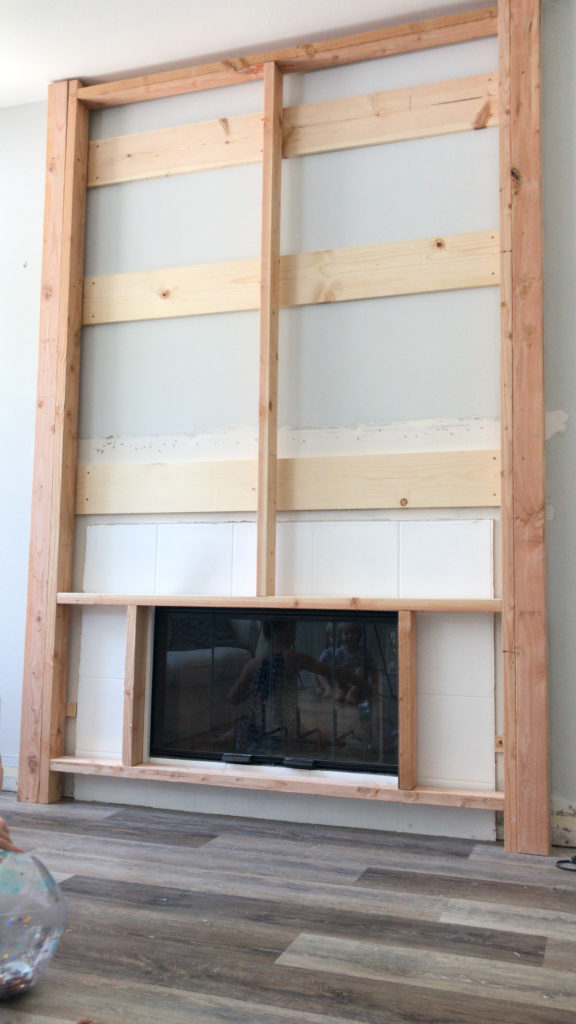
Structure build
First off, just like Reagan’s fireplace, we needed to create new studs to screw the structure into place. We used 3 1x8s across the entire width of the fireplace and screwed them into each wall stud for support.
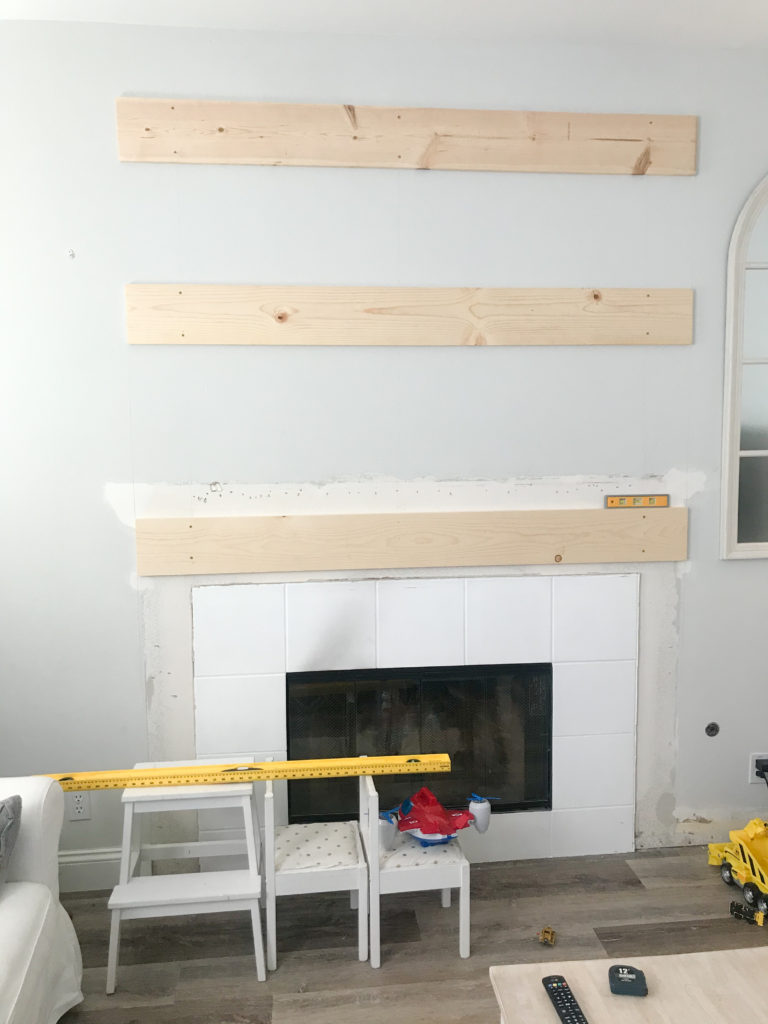
Once that was done, we built up depth because I wanted the fireplace to pop off the wall by 5 inches. Reagan’s fireplace had a lot more depth so I had to create my own plan for the sides. We used two 2x4s for each side with an extra piece of wood in between them every few feet to make the 5inch depth I wanted.
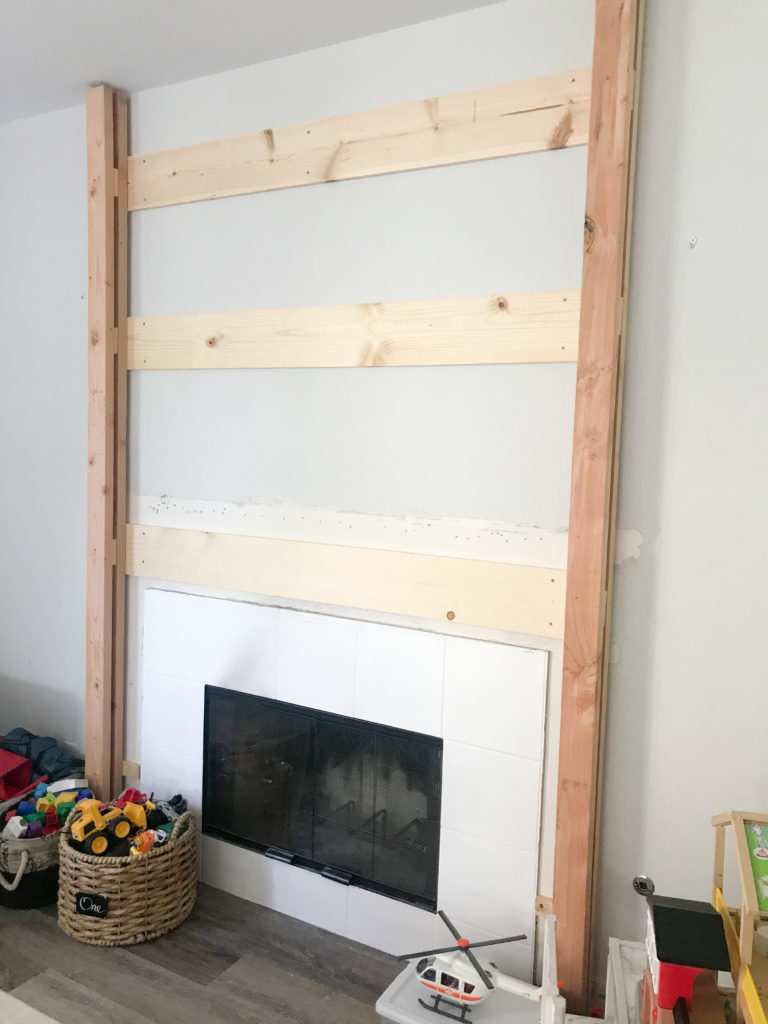
Next was the frame for the fireplace. Although I had created depth for the design, the fireplace itself was still flush on the wall. So the frame had to recess back to where the fireplace doors were. Reagan’s plans came in handy here because she created a frame to house her electrical fireplace. I used the same concept to create the recessed ledge to frame out the fireplace.
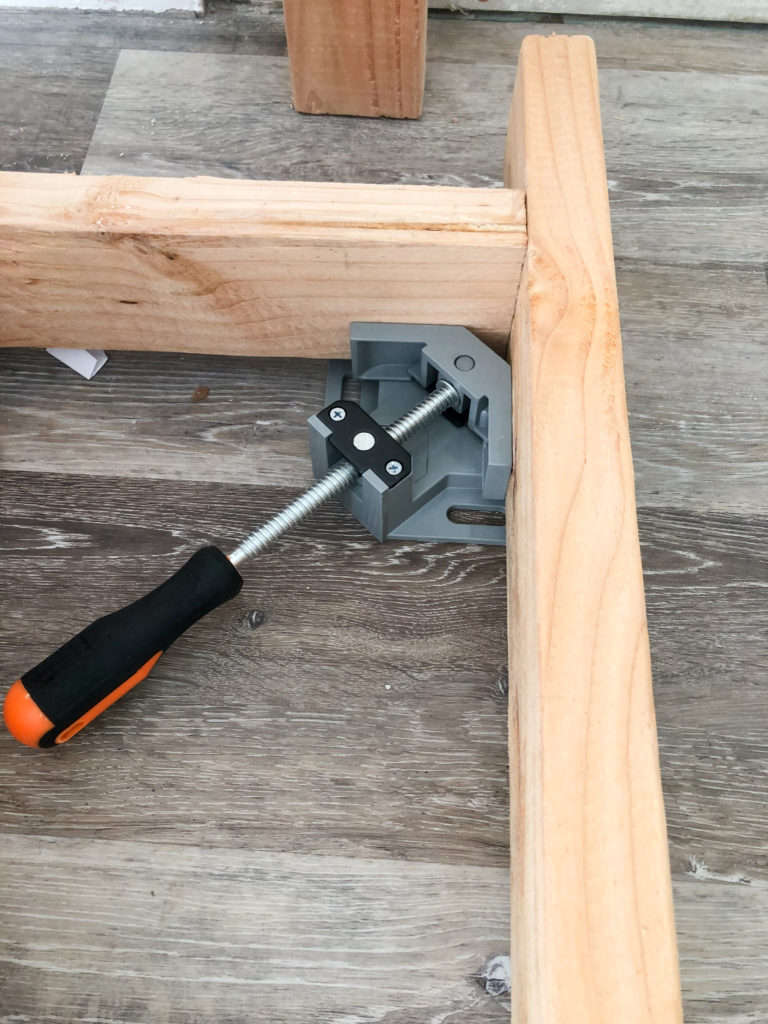
A little tip when building structures, use the floor to keep surfaces you’re screwing together flat and level.
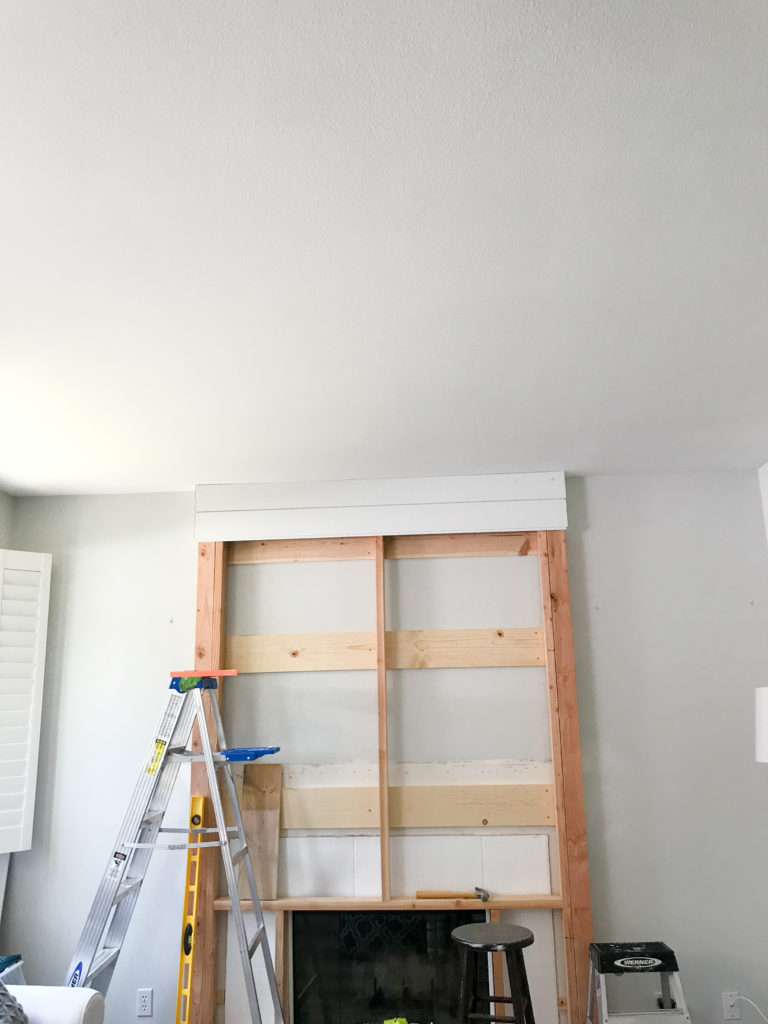
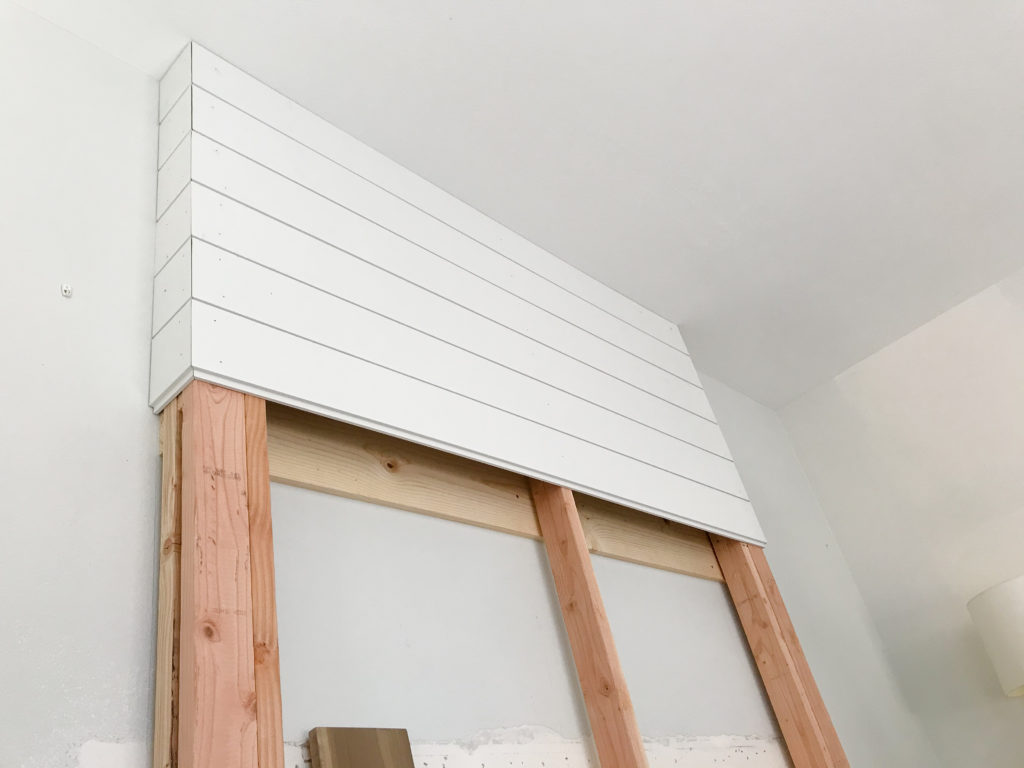
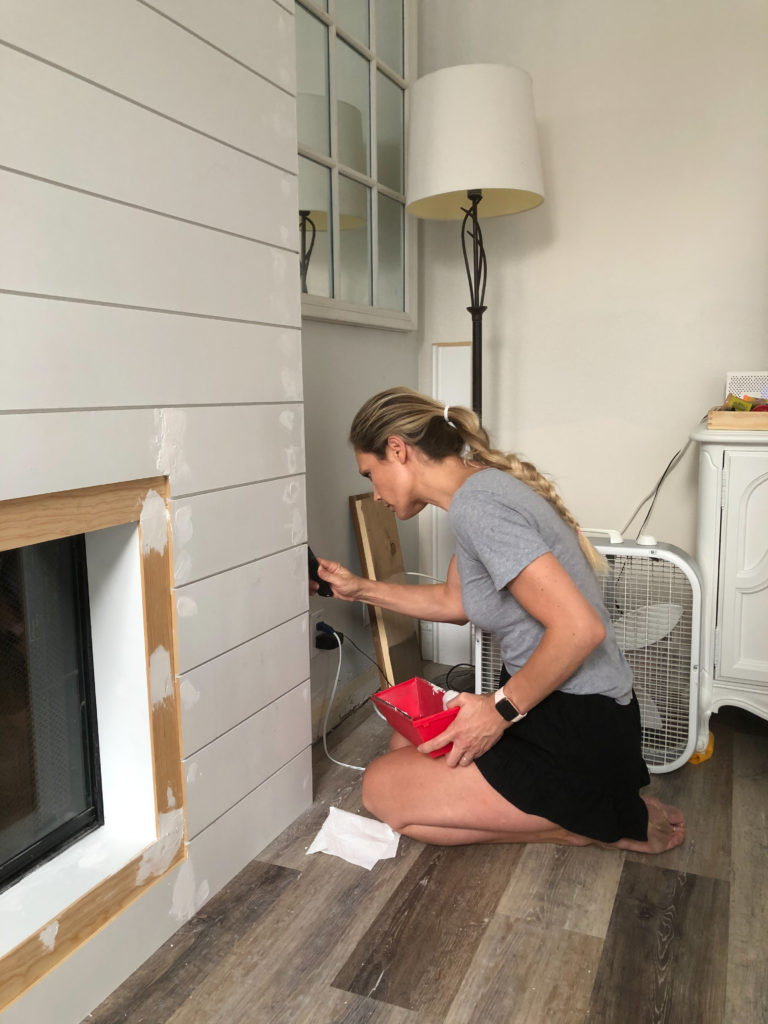
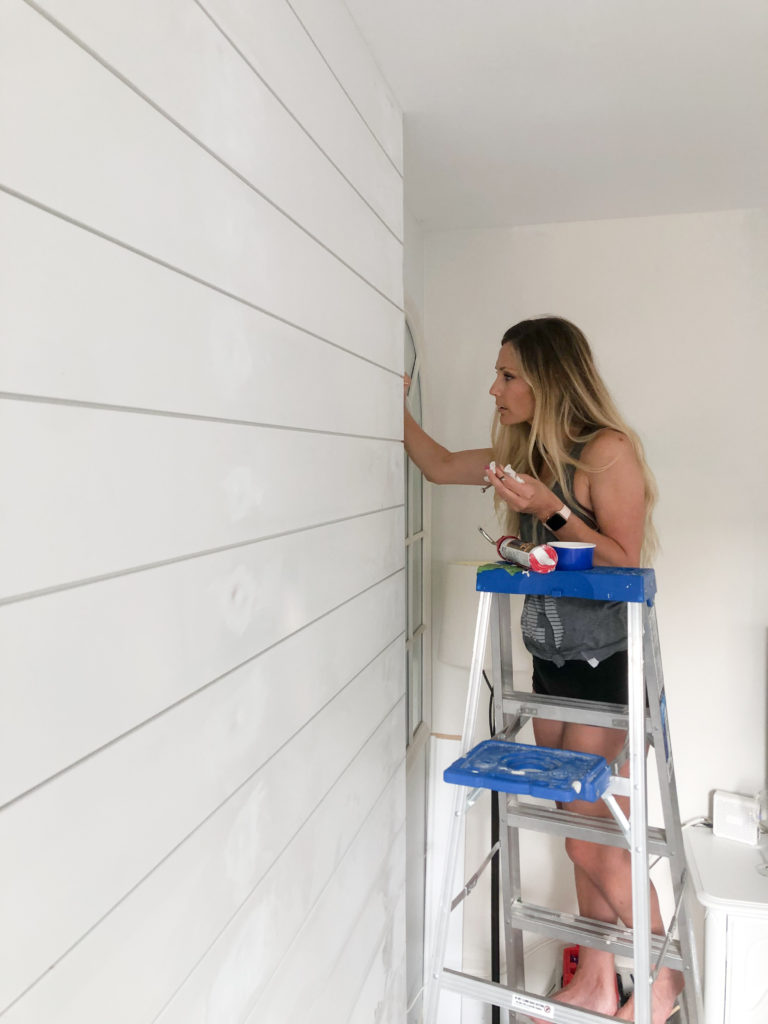
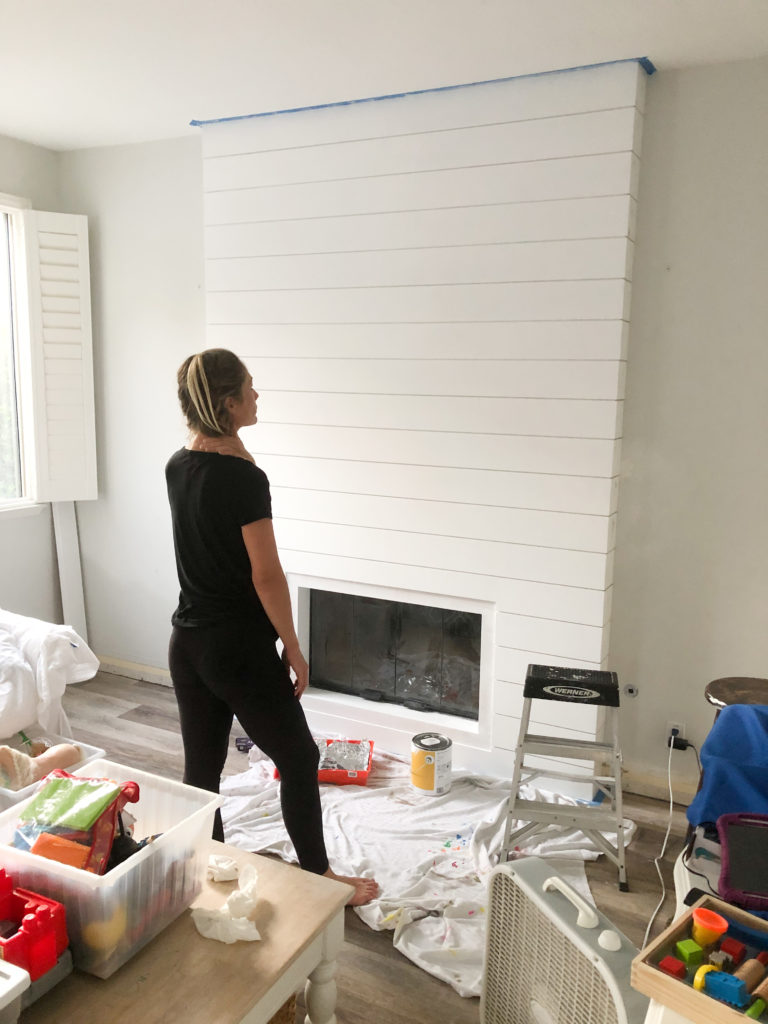
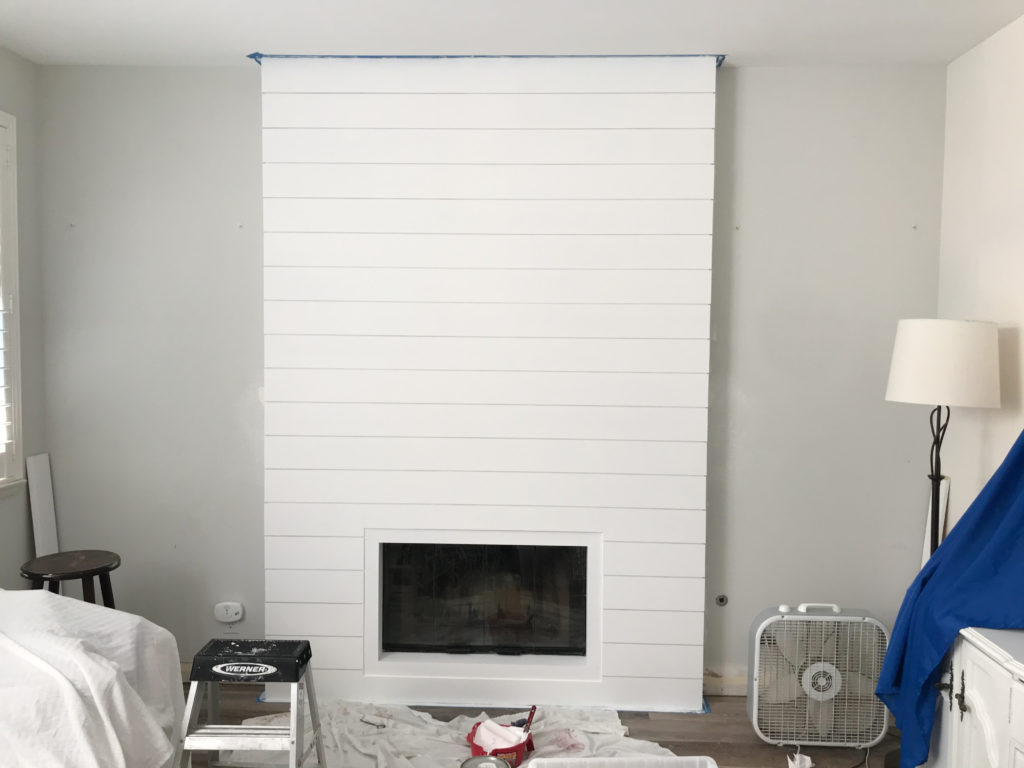
Shiplap, shiplap, and more shiplap
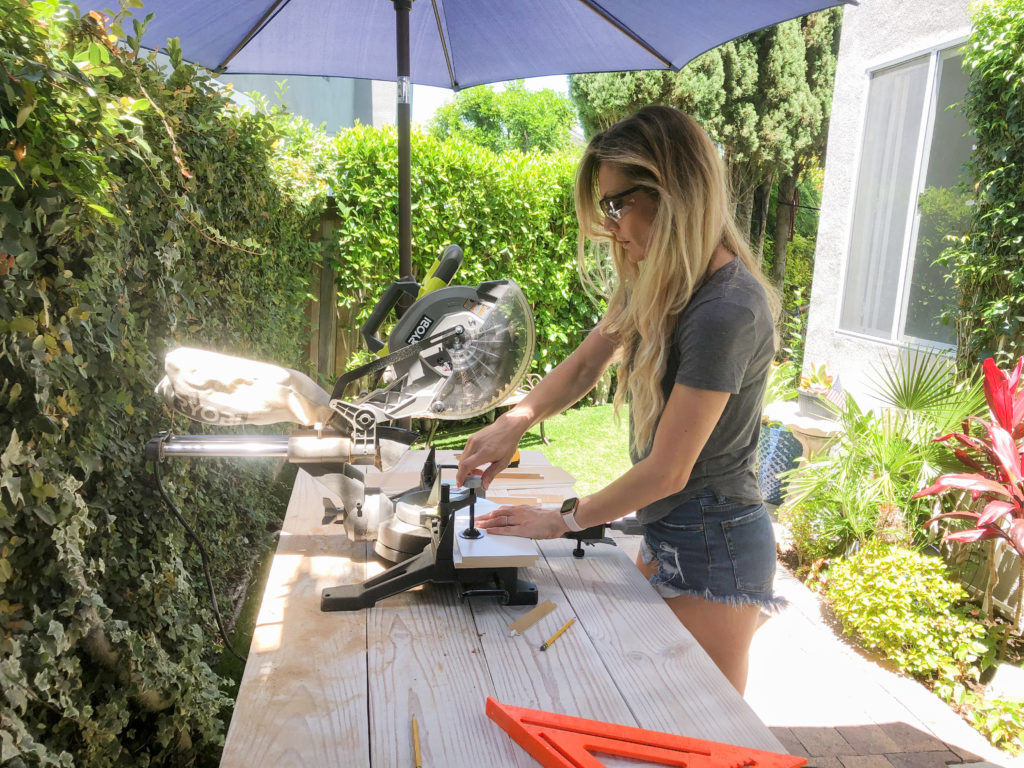
For our first build, we were proud of how it turned out. It was strong and sturdy!! For the shiplap, I was dead set on having beveled corners. So this is where the miter saw came in handy. At first, I couldn’t line up the corners perfectly. It drove me mad! After a few boards and some research, I learned that not all miter saws have a perfect 45-degree angle by just placing the blade pin at 45. It’s highly suggested you calibrate your blade by using a magnetic angle gauge to make sure the blade is at a 45-degree angle. This helped a lot! Soon we were on our way and the more we cut, the better we got at it. Of course, joins were not perfect, but that’s where good chalk comes into the equation.
Ran into a problem, sometimes you got to pivot.
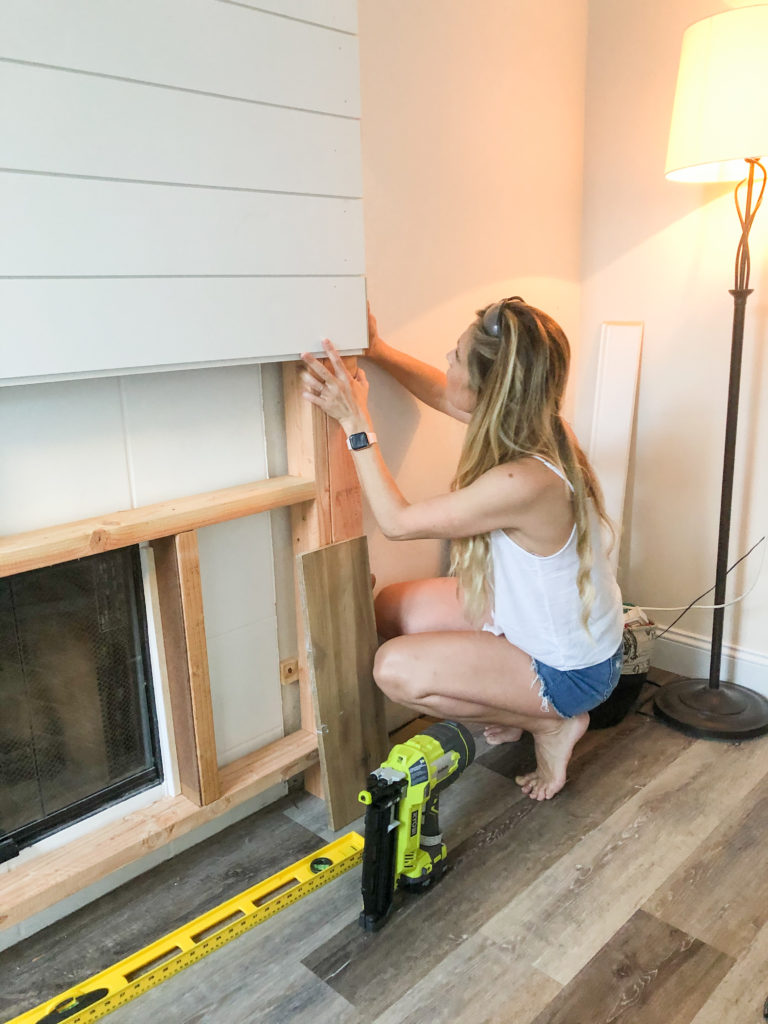
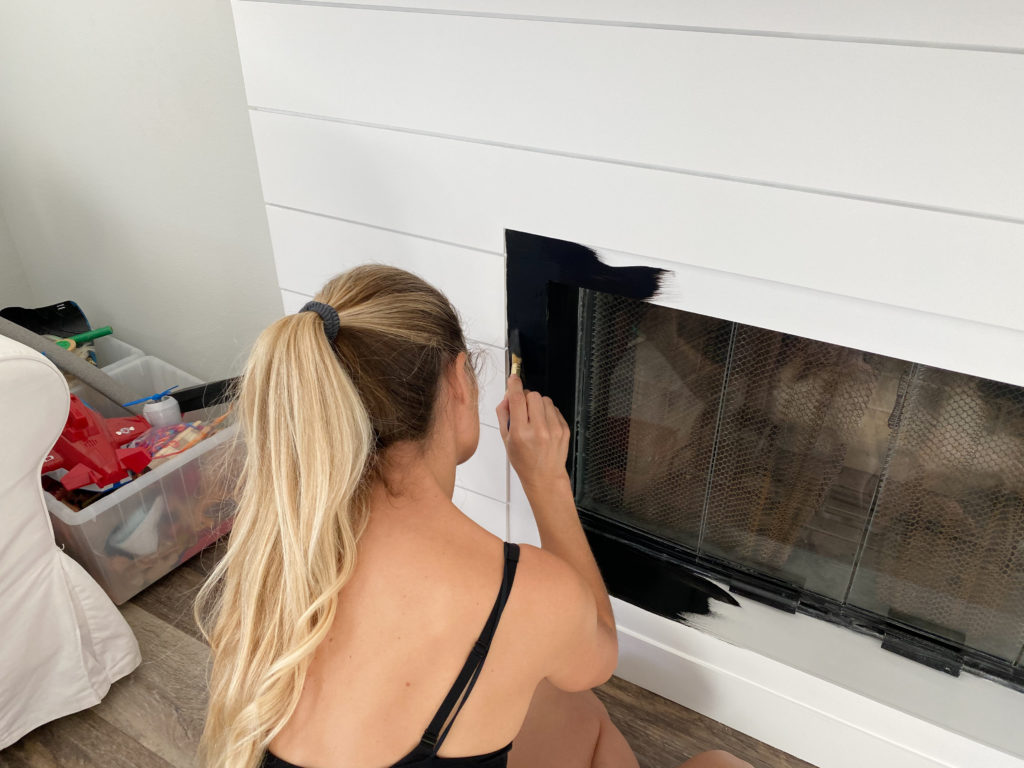
Unfortunately, I didn’t mathematically plan how to start the shiplap at the ceiling. I was too eager and jumped right in and used a full board for the top. By the time I got to the recessed edge, I had a little sliver of shiplap to bevel to wrap around the recess ledge. It was not going to work because of the tongue and groove system, the plank was too skinny. I envisioned a perfectly shiplapped fireplace that wrapped the shiplap into the recessed ledge to the glass doors. That wasn’t going to happen unless I pulled ALL the boards off and restarted. So I had to pivot.
New plan…
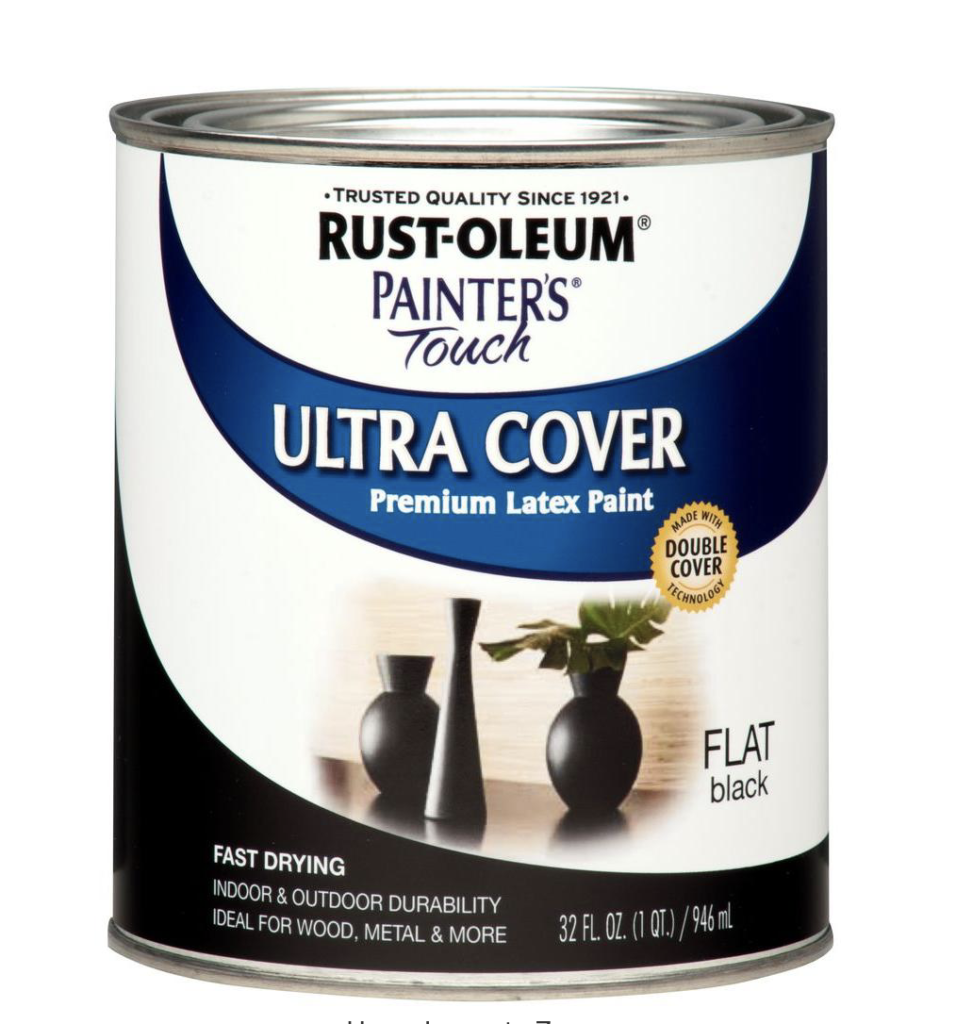
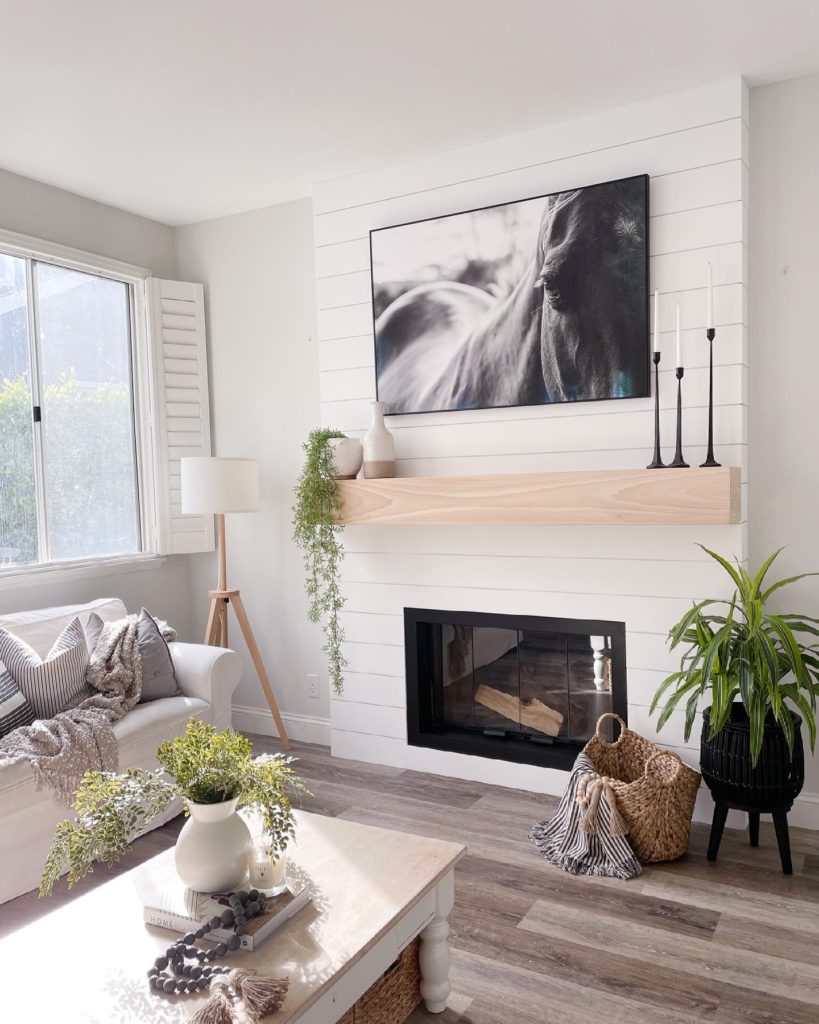
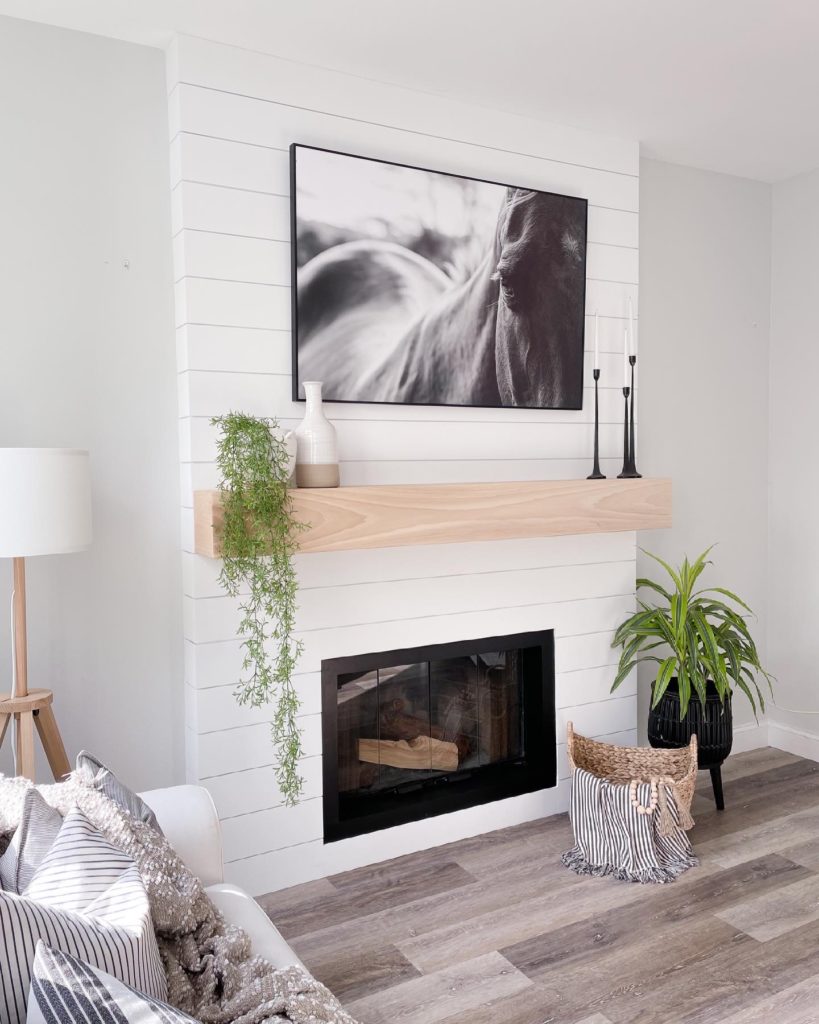
I created a slightly recessed frame for the ledge with 2.5inch Lattice moulding. (actual measurement is always smaller) Because the ledge wasn’t shiplap, I wanted the frame and recessed ledge to disappear. I wanted to somehow create an illusion that the fireplace wasn’t in fact recessed. I accomplished this by painting the frame and ledge with Rustoleum Painter’s Touch Ultra Cover in Flat Black.
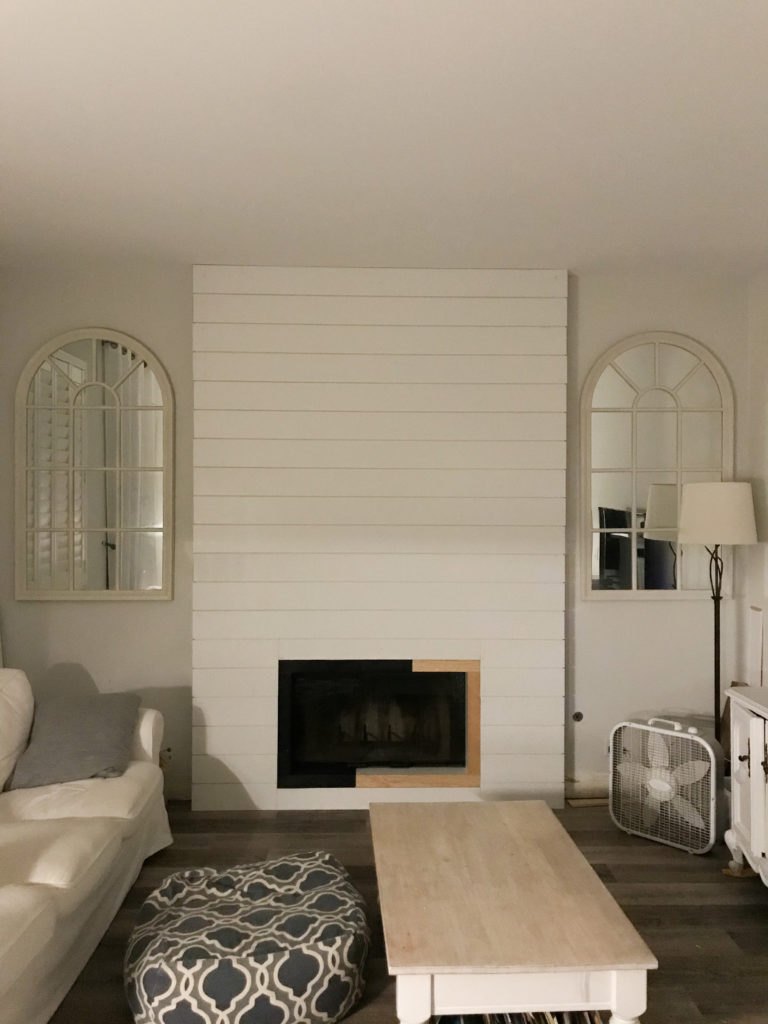
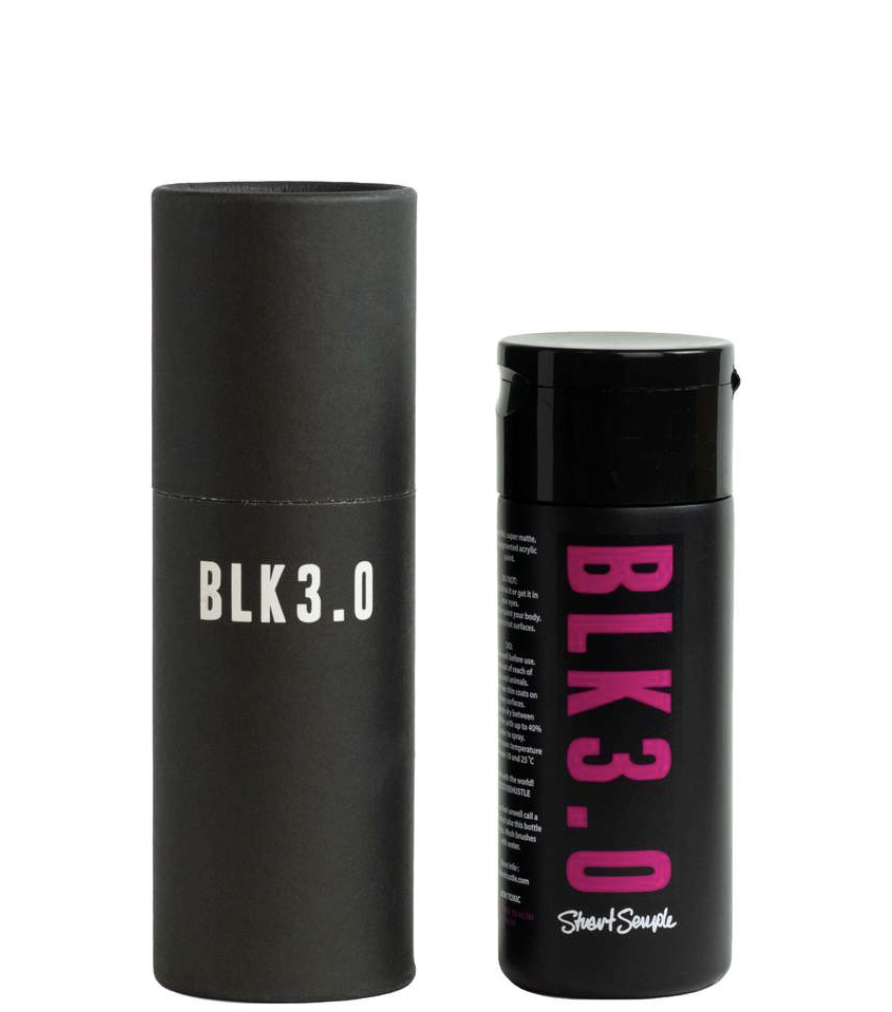
At first, I went down a rabbit hole of the blackest black paint on earth, but that was more for art pieces and the paint was very fragile. I found it intriguing and it was amazing what could be done with this blackest black called black 3.0. It created a black void with no shine. Objects just disappeared in the shadows. My next best option was Rustoleums matte black. It created that black void I wanted. It’s so dark and matte, that it created a shadow, an illusion of the fireplace being wider than it is and flush with the shiplap.

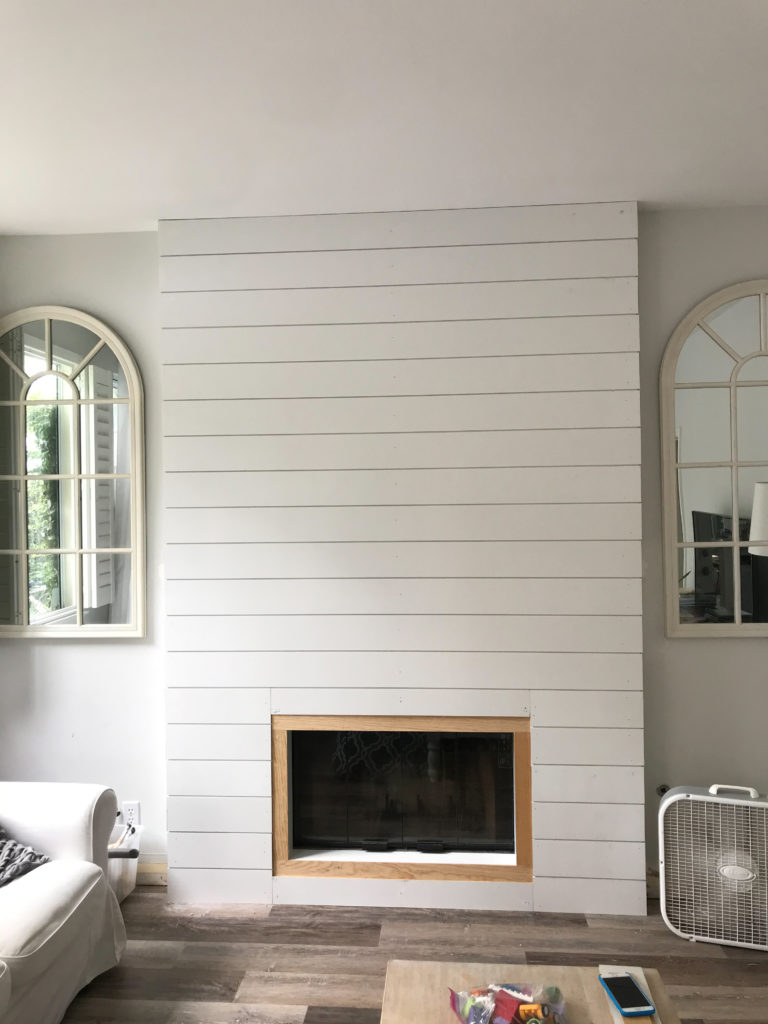
The key to any build, especially one that will be painted, is chalking and filling in joins and nail holes with wood filler! With a little sanding, both cover any imperfection and seamlessly join boards together. I love the GE Chaulk, it’s my ultimate favorite. I painted the entire fireplace with Chantilly Lace by Benjamin Moore, using a foam roller. It’s the perfect white!
Mantle
What I wanted
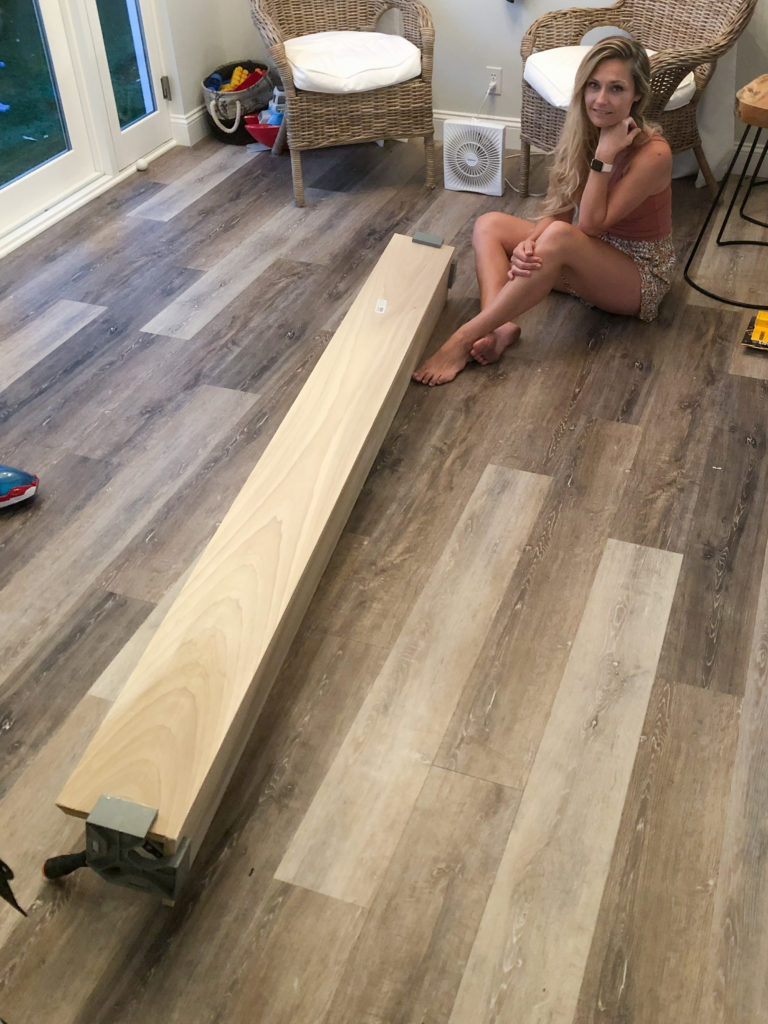
Ideally I wanted a chunky rustic mantle just like ‘A HOUSE WE BUILT‘ but it was a little out of the budget. Ok, way out of our budget! We decided to build one instead, using poplar wood. Poplar wood has lots of character and pretty color tones. We found some perfect boards from home depot.
The plan I followed
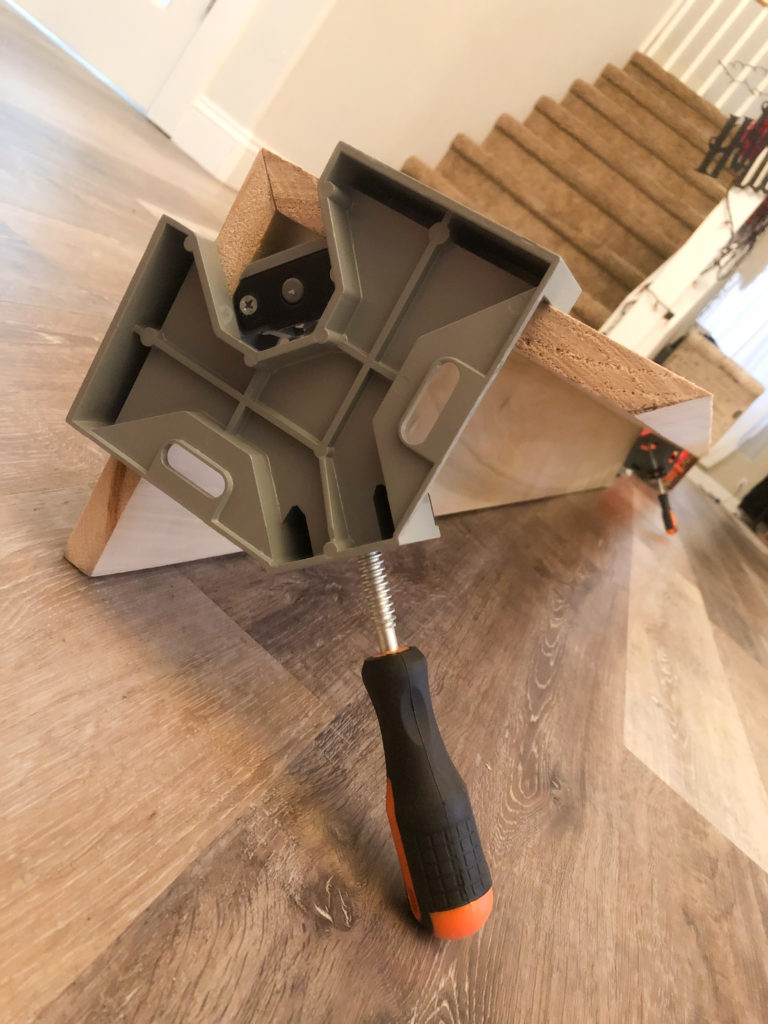
Altho Reagan had a beautiful mantle she made with straight cuts, Shannon and her husband over at ‘LIVING WITH LADY‘ gave me the confidence to make the mantle with beveled corners. I was scrolling on Instagram one day and came across Shannon demonstrating on stories how to blend the seams where the beveled corners met. It blew my mind and I had to try it. This is where the table saw came in handy. The blade on the table saw can tilt at a 45-degree angle so you can make long beveled cuts. Again, the magnetic angle gauge was key here because the blade was slightly out.
How I accomplished it
I ran each board thru the table saw and cut the beveled edge on both sides on the front piece, and only one side on the side pieces. Laid them out flat on the floor next to each other, squeezed glue on the edges, pulled them up right to meet, and I secured it by nailing in a nail. The small ends were the trickiest sides because 3 sides out of 4 needed to be beveled and fit perfectly into place. This took a lot of trial and error but eventually, we got it the best we could get it.
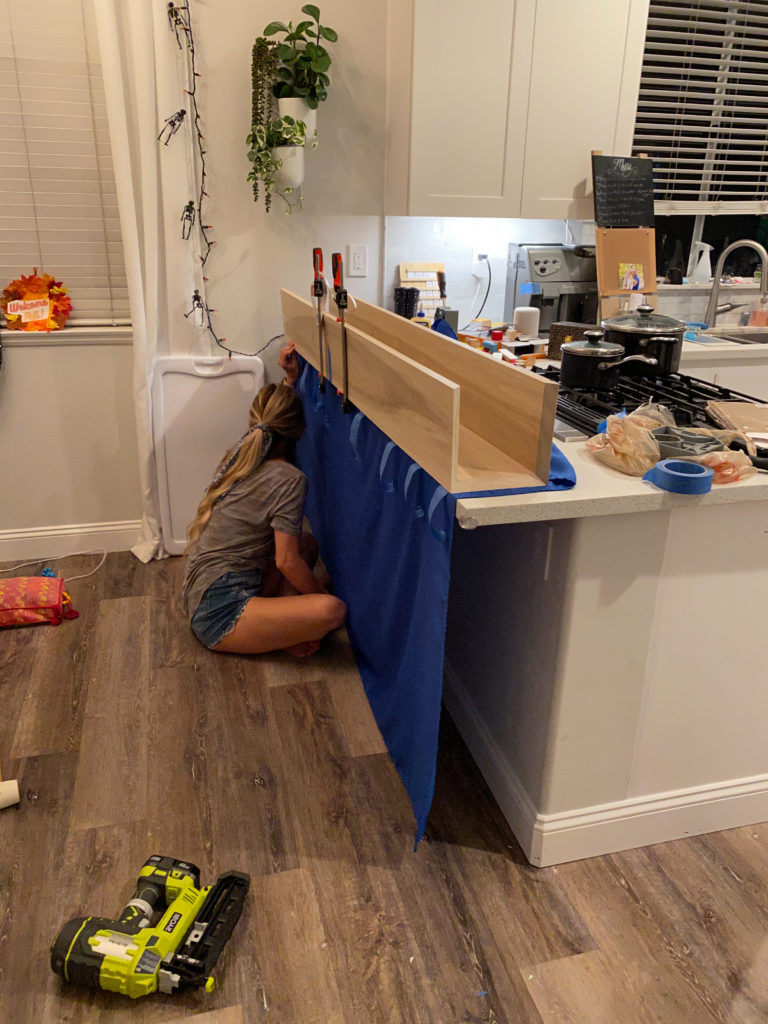
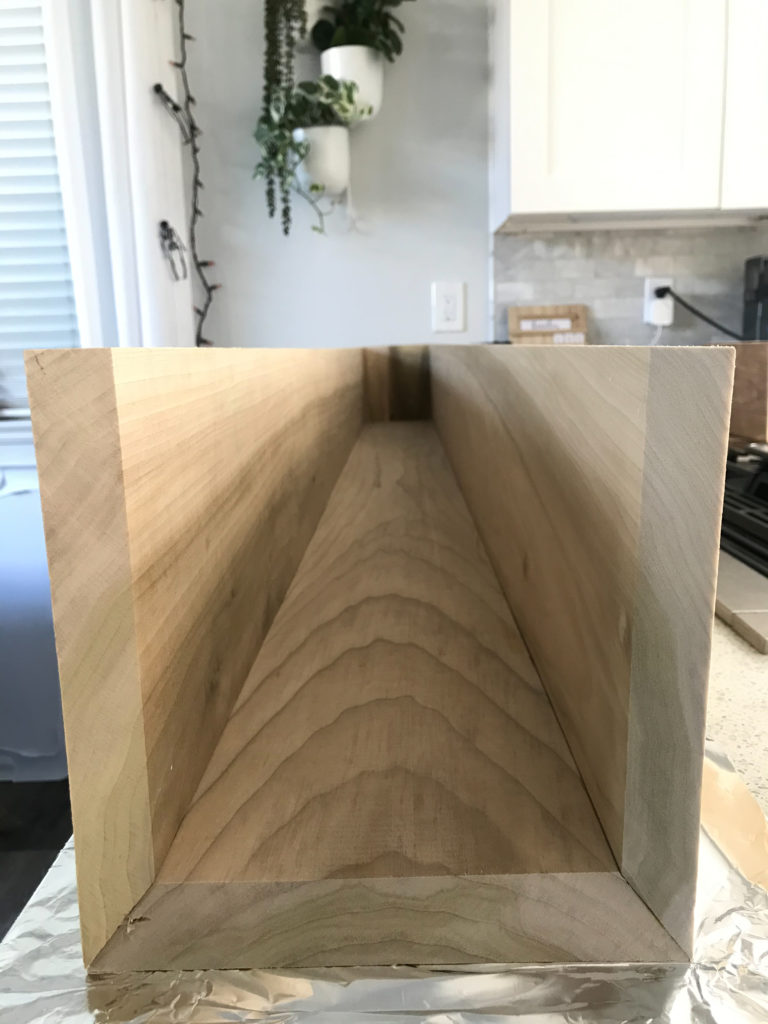
24 hours later, when the glue was dried, I tried Shannon’s trick to blend the seams at the corners. You take the side of a screwdriver and you run it along the seam where the two wood pieces meet and it flattens the wood grains into each other and blends it together, giving you a soft rounded finish. A light sand afterwards made it smooth and seamless. I totally geeked out on this trick. It worked so incredibly well that it made the mantle look like a thick chunk of wood.
To stain & seal the mantle, or not to stain & seal the mantle?
Now the time had come to stain it and seal it. I loved the raw poplar wood so much I didn’t want to stain it. I knew it had to be sealed but I was worried if I used a poly it would change the color. Again, Instagram presented a fellow DIYer, Christine, over at ‘LIVINGMYDIYLIFE‘, that had also made a poplar mantle with beveled edges. Christine was talking about using a traditional soap flake method to seal her mantle the one day and I had to message her about it. She too loved how the raw poplar looked and explored ways of sealing the wood without changing its color.
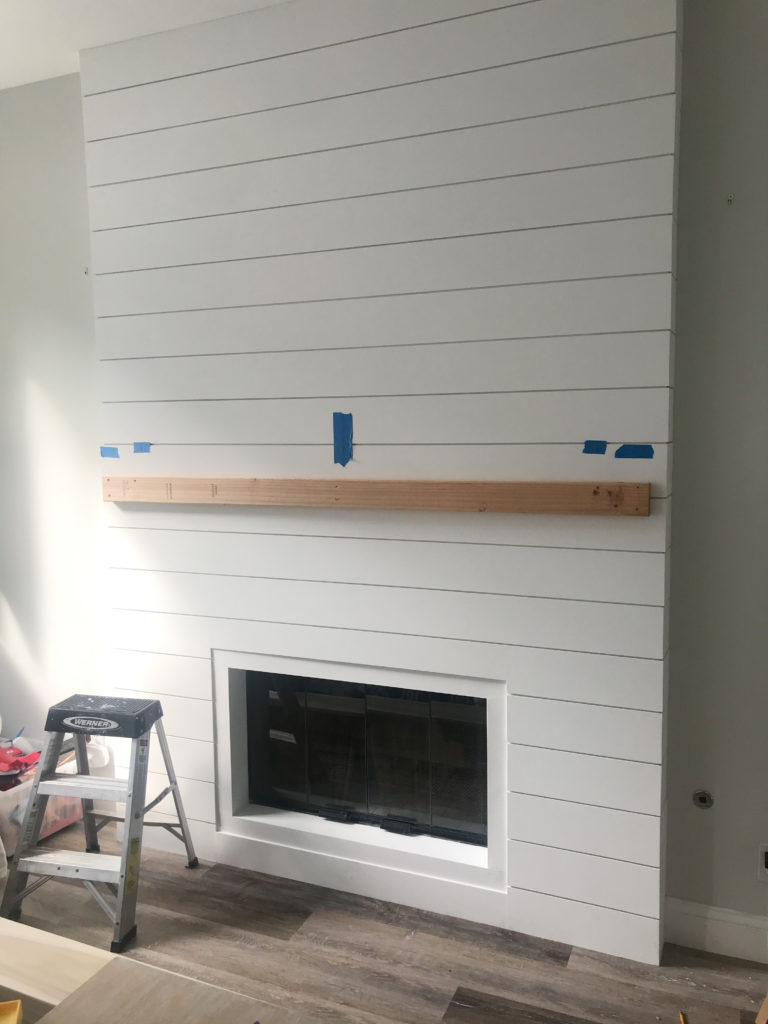
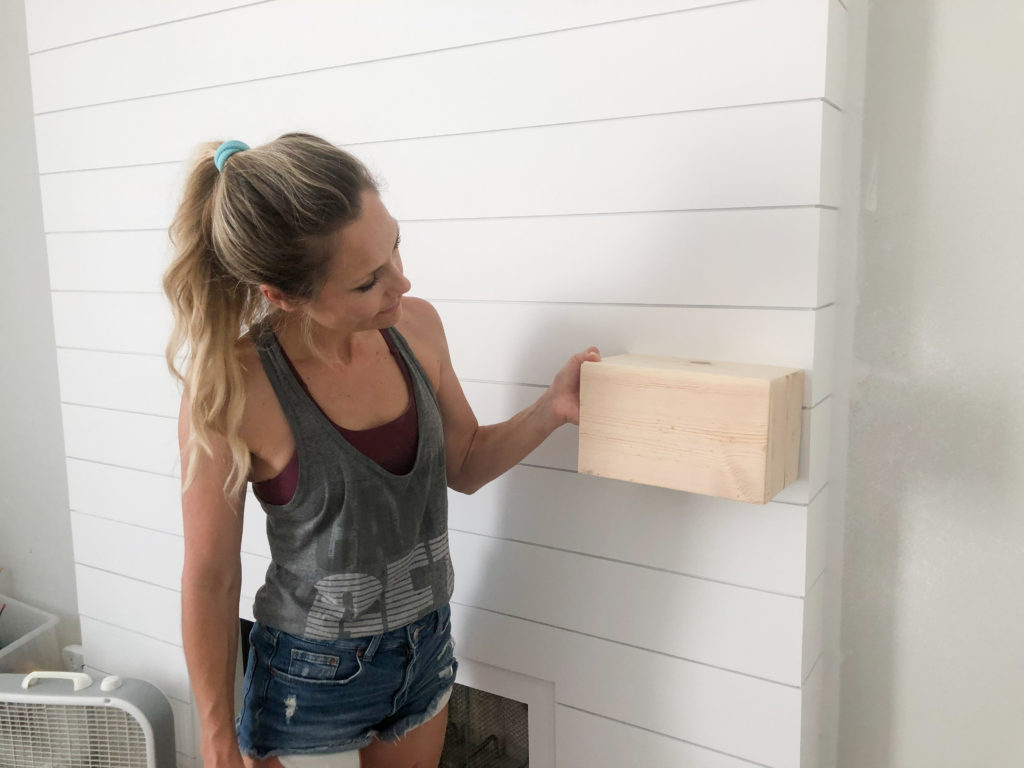
I decided not to seal my mantle and hang it in the interim while I figure out what to do and test out Christine’s sealant options. To hang the mantle we screwed a cleat into the shiplap. The mantle fit over the cleat, so it was hidden but offered support in holding it up. The mantle was secured into it with strong screws in the top.


When you come to the end of a project and put down that last tool…
We stood back and looked at the fireplace remodel in awe. We did it, we built something out of nothing and we loved it! My husband and I both looked at each other and said WHAT’S NEXT! And that’s how our journey on IG began. We have a never-ending list of DIY projects in the house we want to tackle and share with you. So stay tuned!
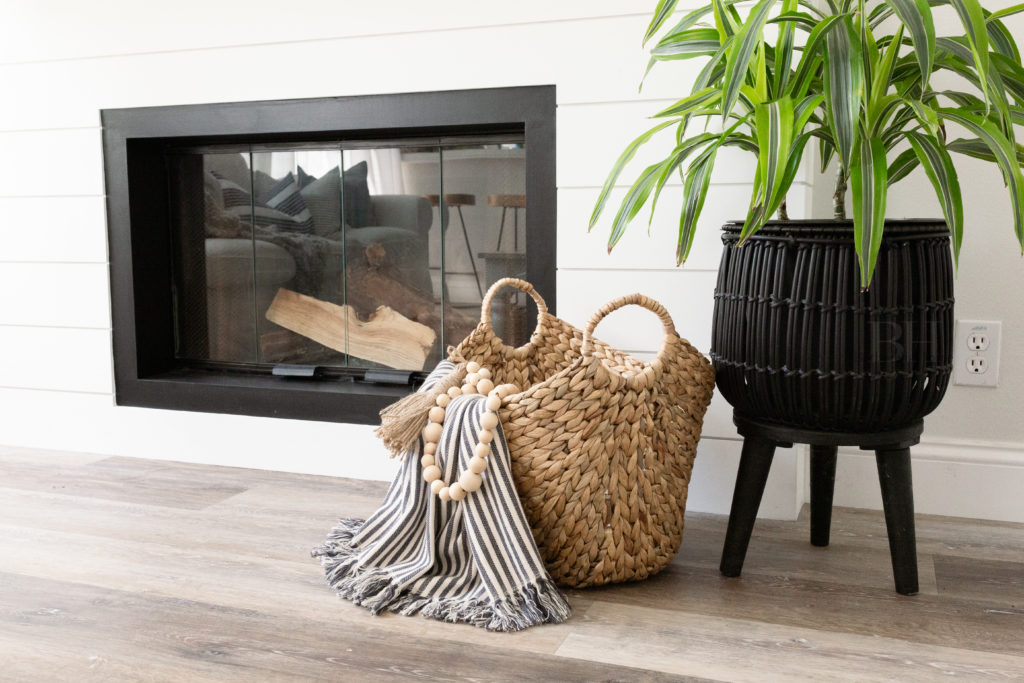
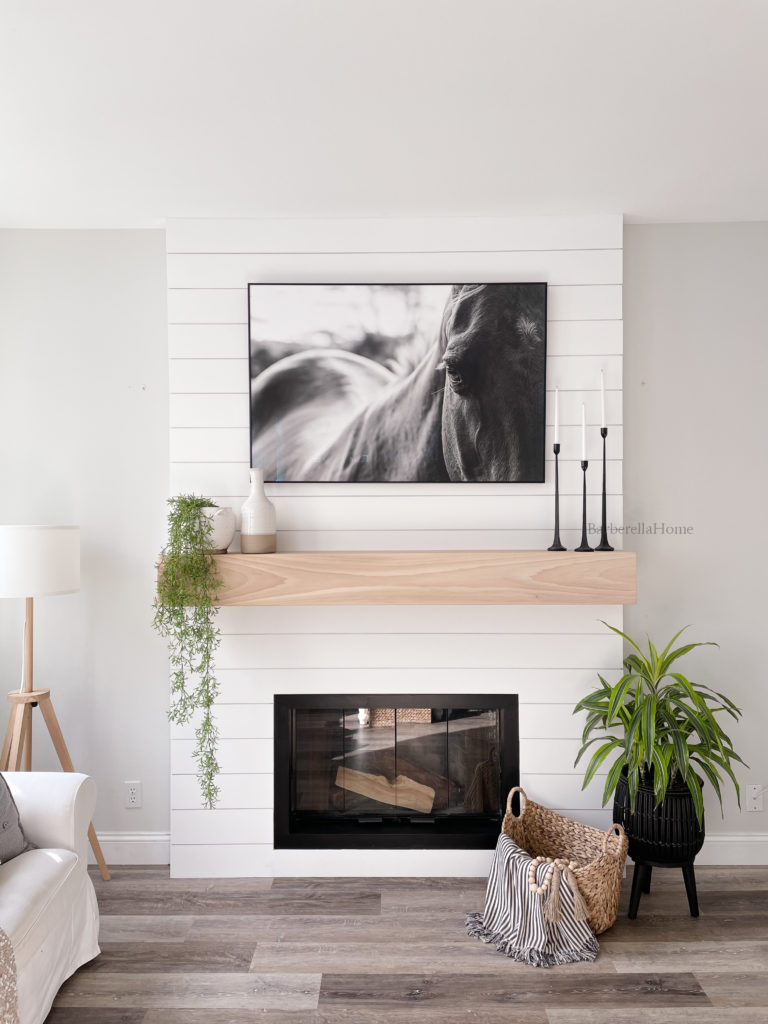
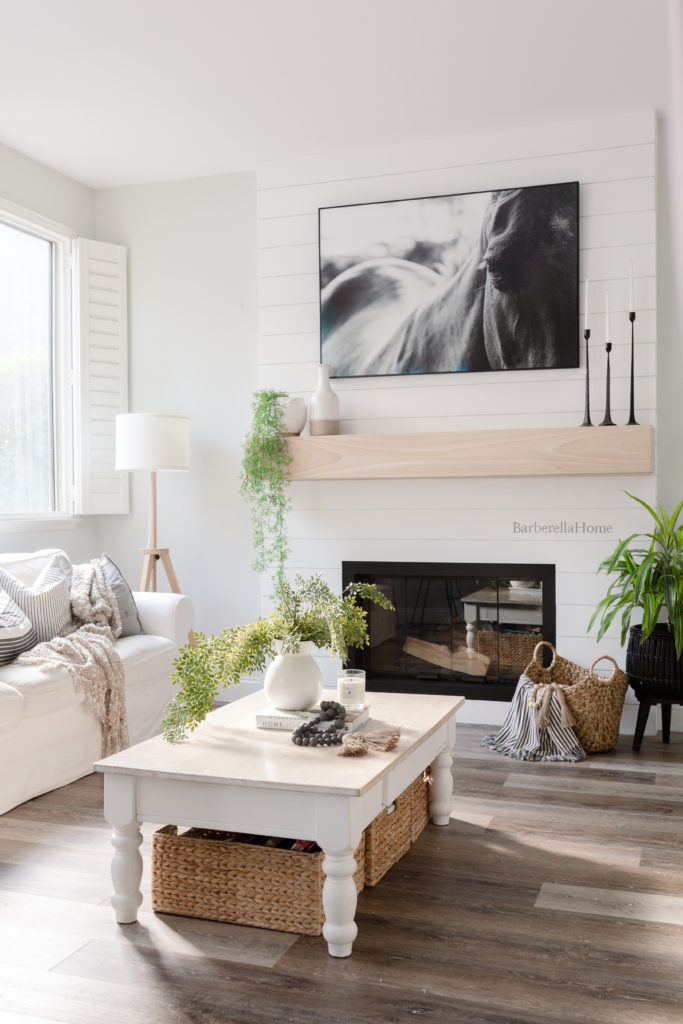
DECOR USED FOR THE FIREPLACE REMODEL AND MANTLE:
- Black candlesticks: Small, Medium, Large
- Vase with beige bottom
- White speckled pot with handles
- Greenery on mantle from Hobby Lobby
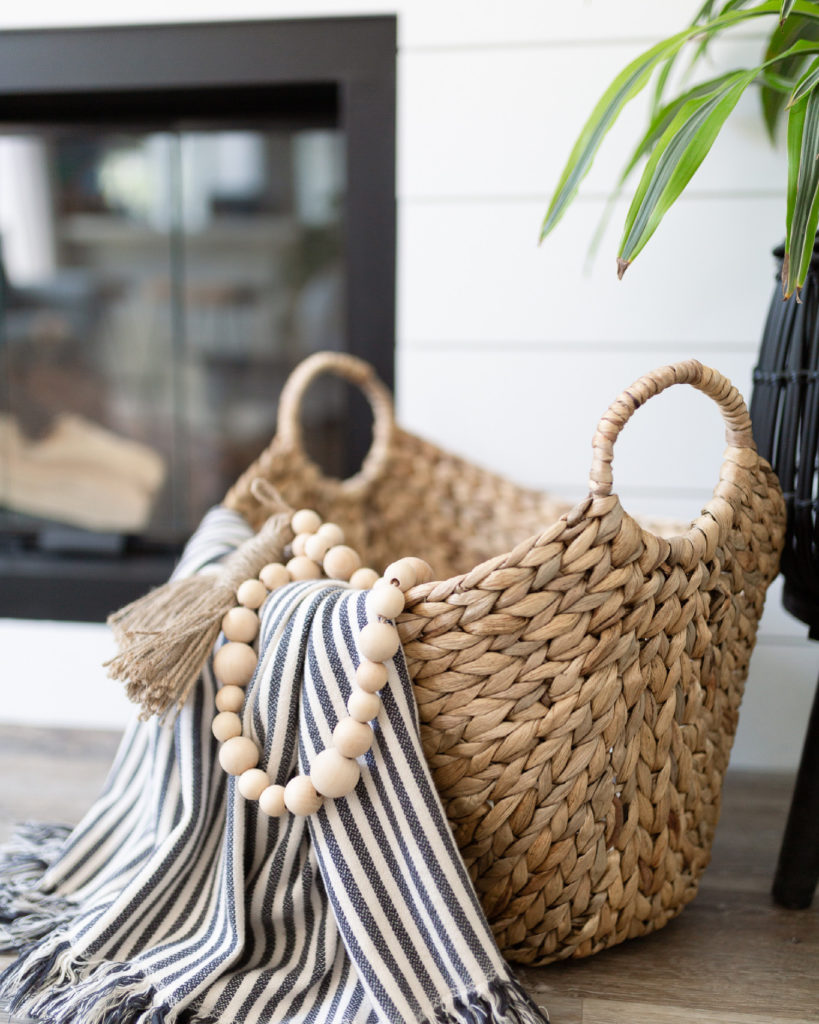
- Boat basket
- Beads: Natural & Grey
- Striped throw – no longer available
- Black pot for plant (plant is real) from Home goods
- Beige throw from Home Goods
- Pillows: Light Fine Striped Pillow, Lumbar Pillow, Dark striped pillow with buttons. Pillow inserts from IKEA too.
- White ceramic vase on coffee table
- Greenery on coffee table from Hobby Lobby
- Home Body – Joanna Gaines
- TIDES Indian Ocean candle
- Floor lamp
- Horse print – I photographed this myself, if you would like to purchase a print please email me.
- Print by First Class Design Co
PAINT USED FOR REMODEL:
- Shiplap – Benjamin Moore – Chantilly Lace
- Grey walls – Benjamin Moore – Grey Owl (lightened by 50%)
- Black frame – Rustoleum Painter’s Touch Ultra cover in Flat Black

4 Comments
So did you ever seal the mantle?
Hi, not yet. Still looking for the perfect stain and sealant.
What did you use for the shiplap? Do you have a link?
Hi Krista, I used the primed 6inch x 8ft MDF shiplap from HomeDepot. The only link I could find was a 10pack. It’s a common product at HD.