
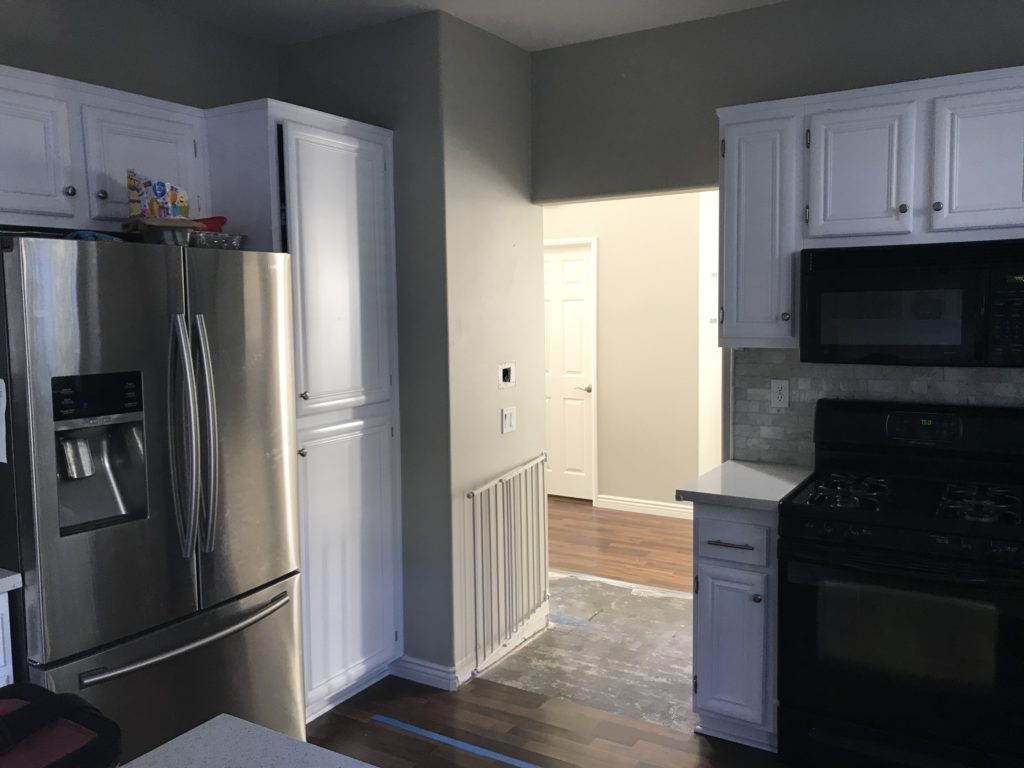
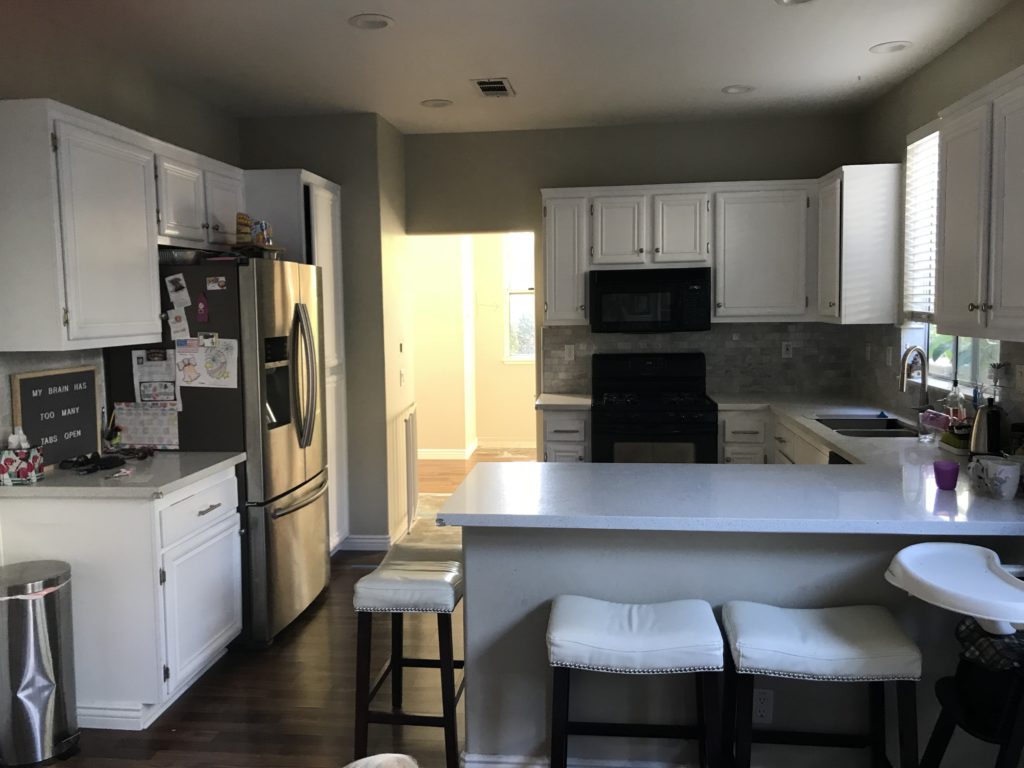
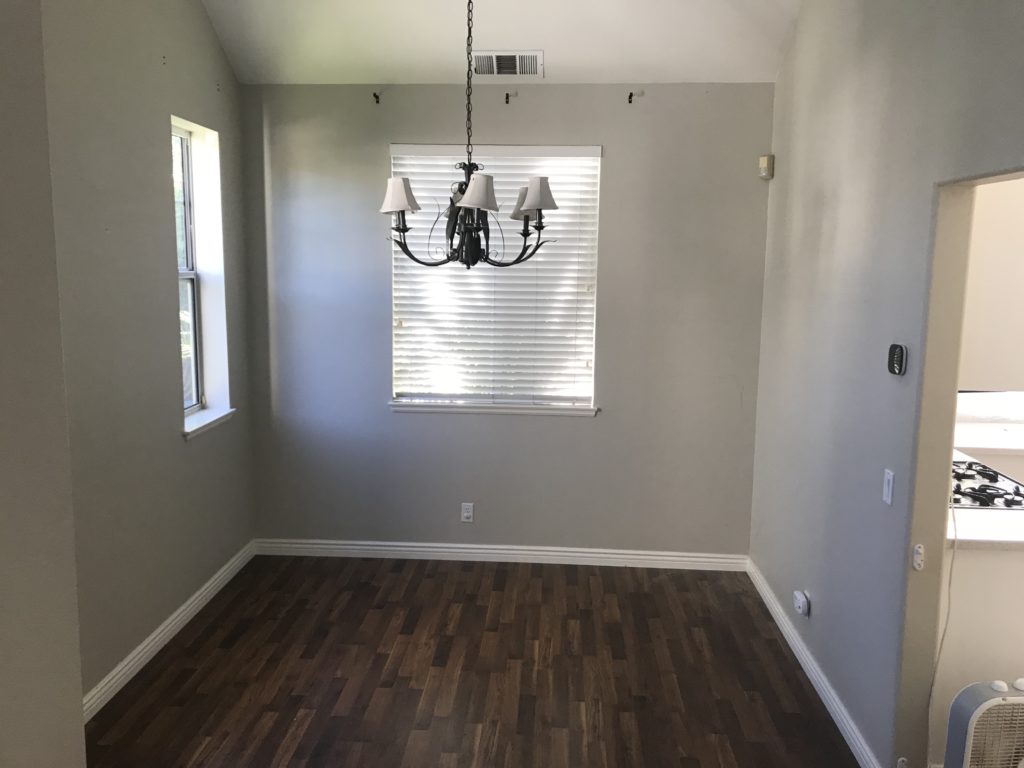
When my husband and I bought this house we envisioned having an open concept plan for the kitchen, lounge, and dining area. We also wanted to take out two small windows and put in a french door that would open into the yard. The Kitchen remodel was a really big project so we outsourced the engineering & construction. I’m going to go through the process including the downfalls and wins along the way.
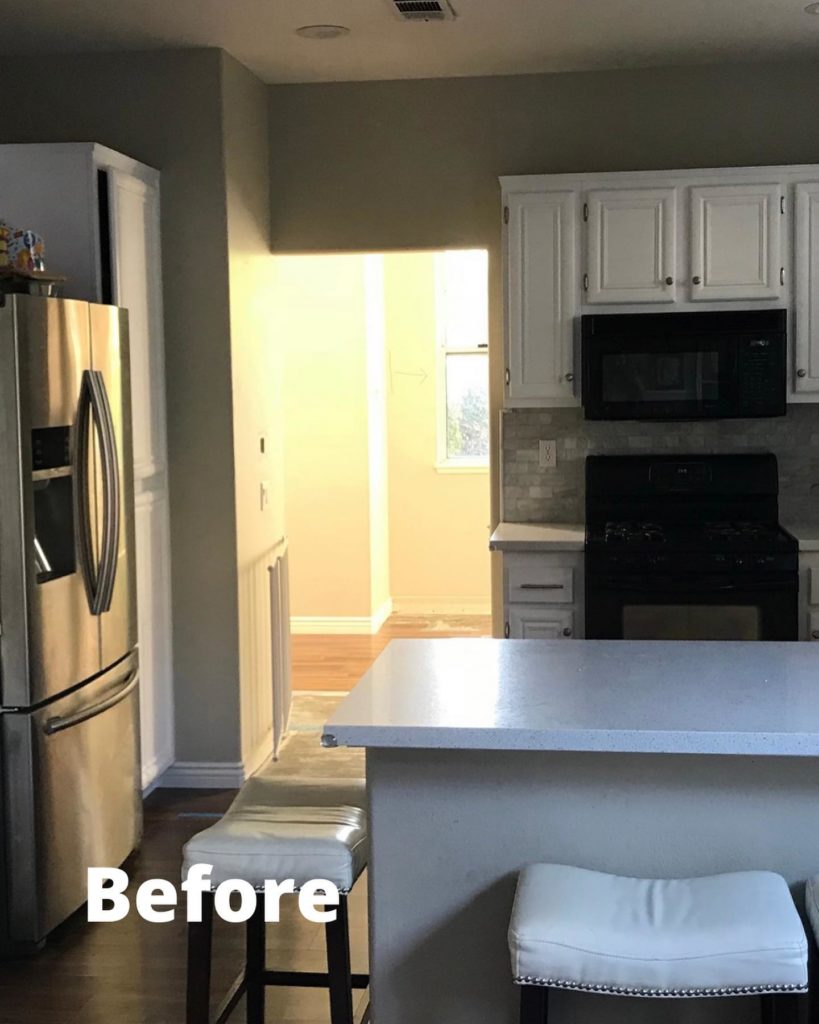
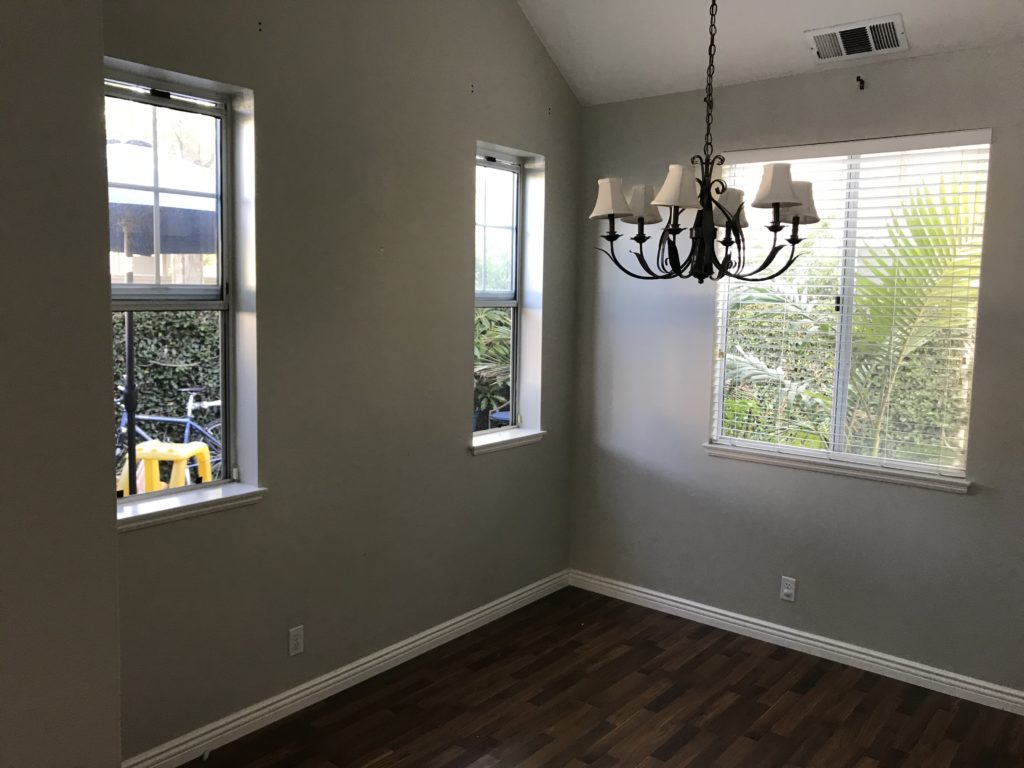
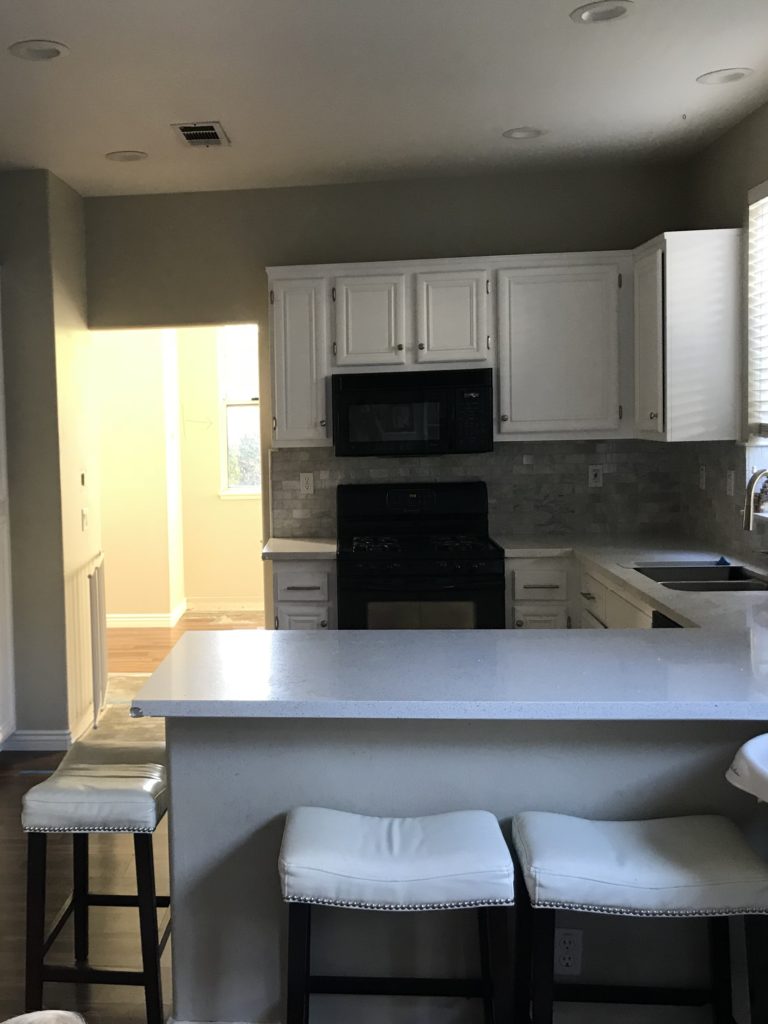
BEFORE PICTURES:
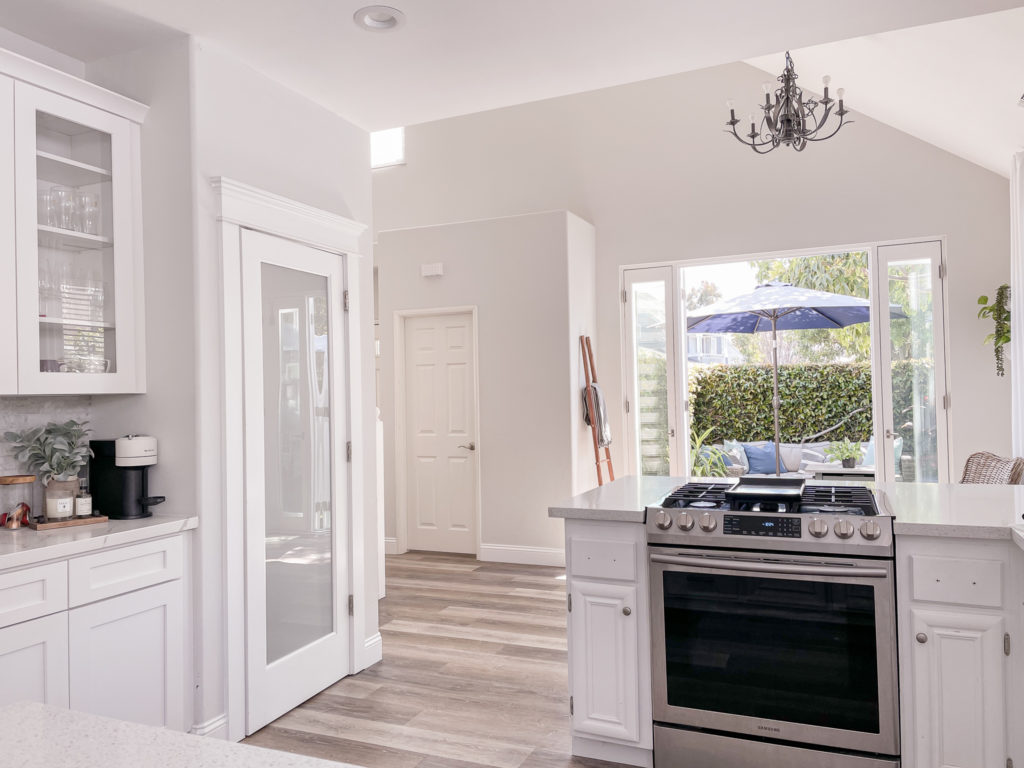
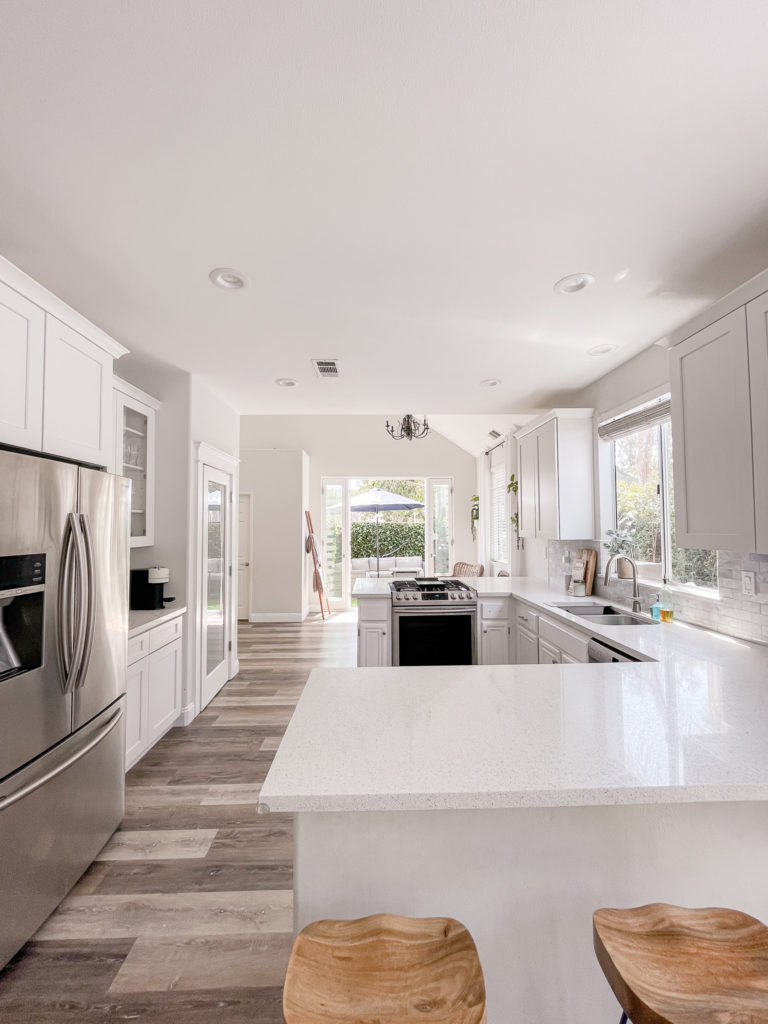
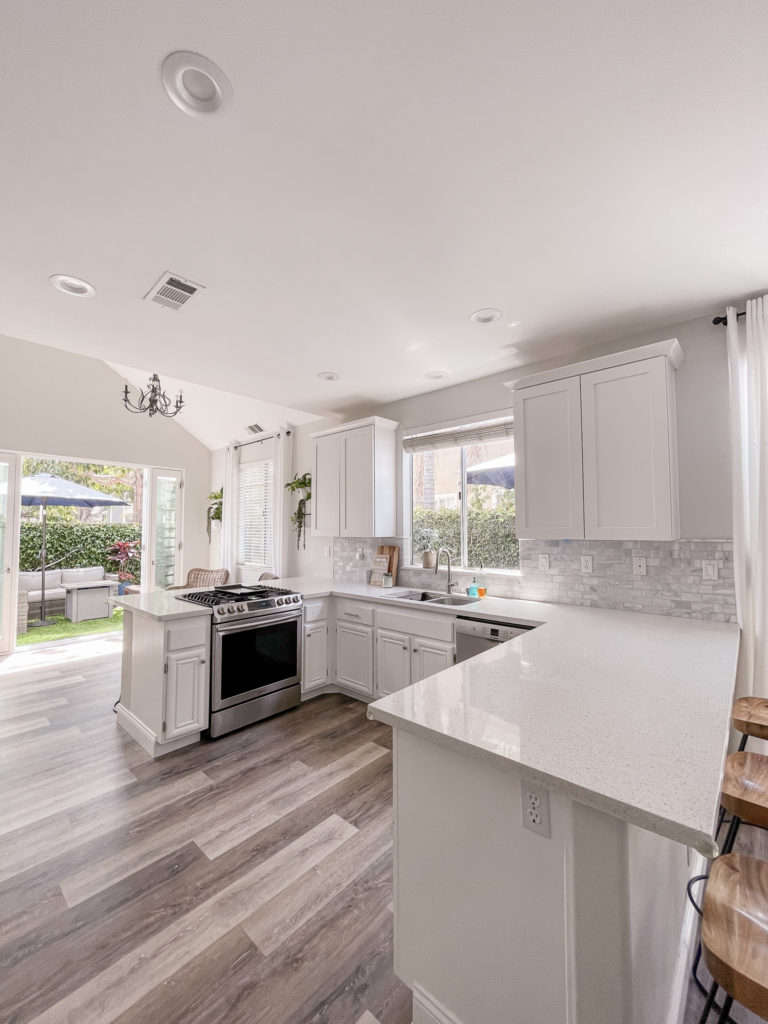
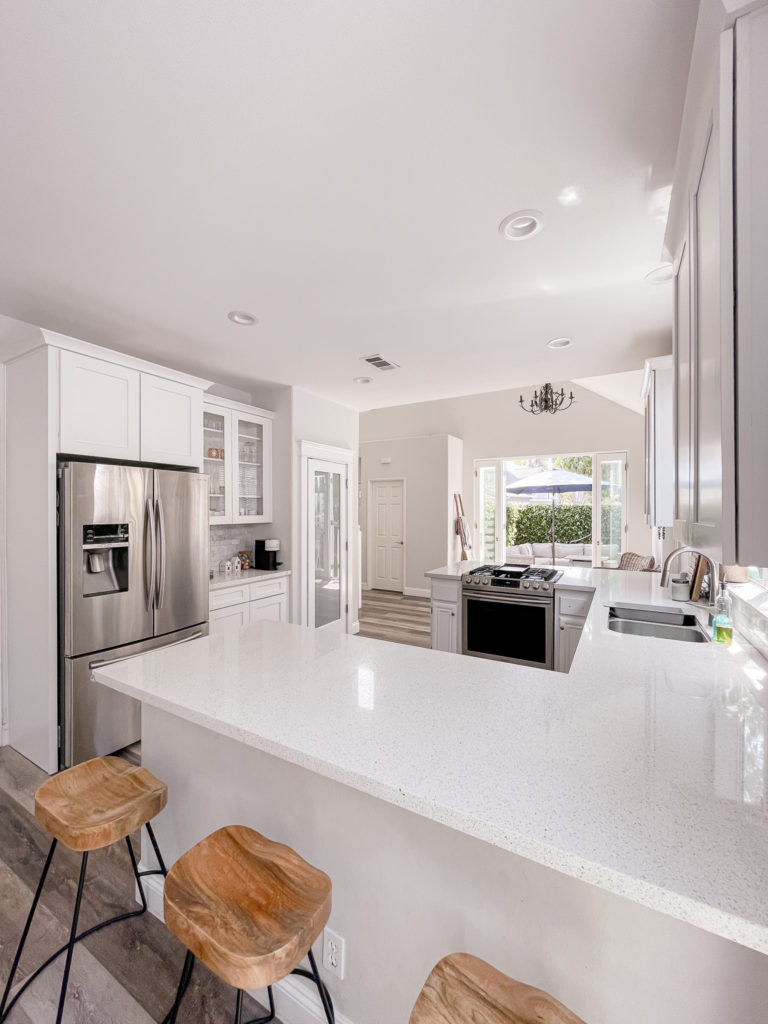
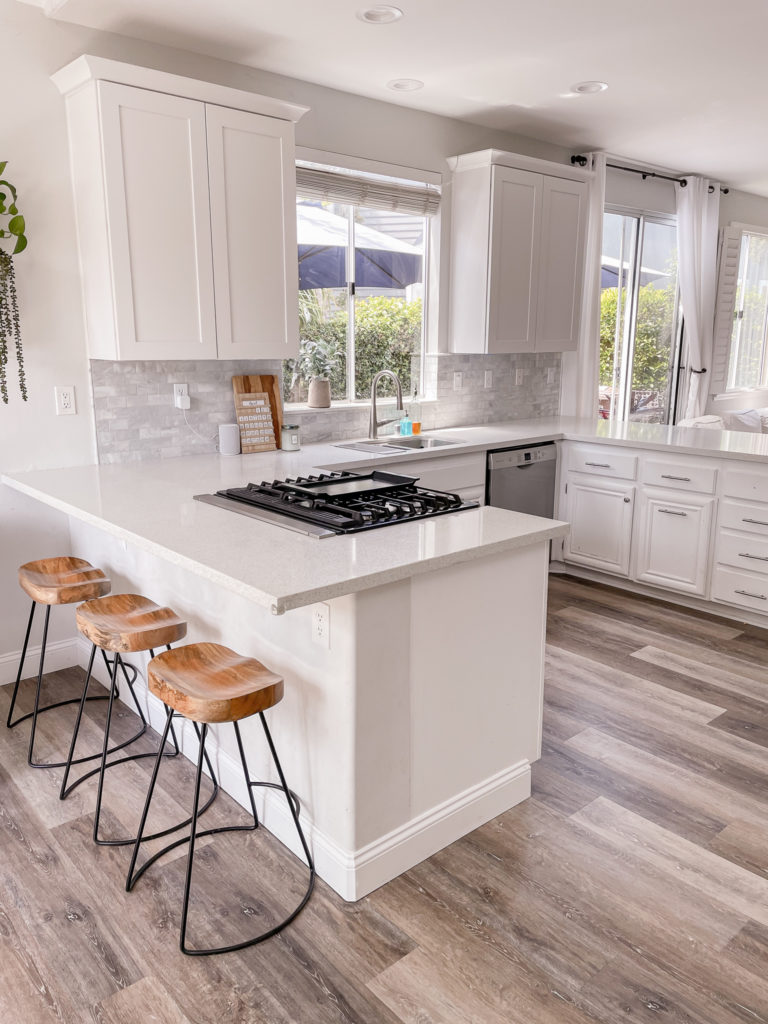
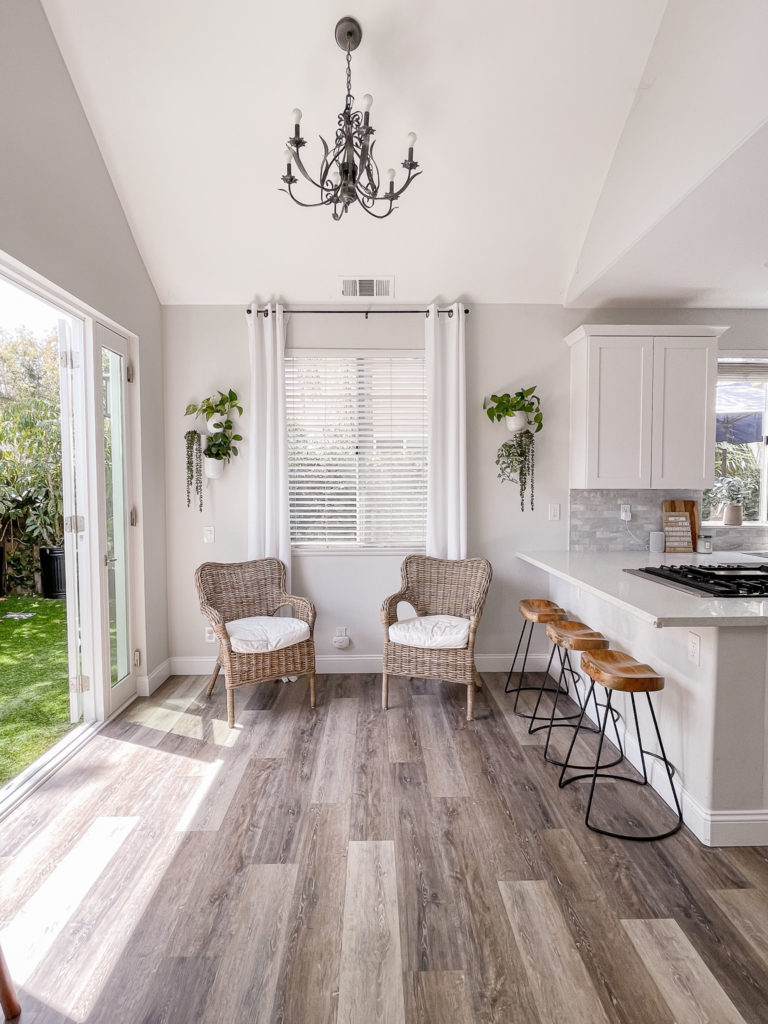
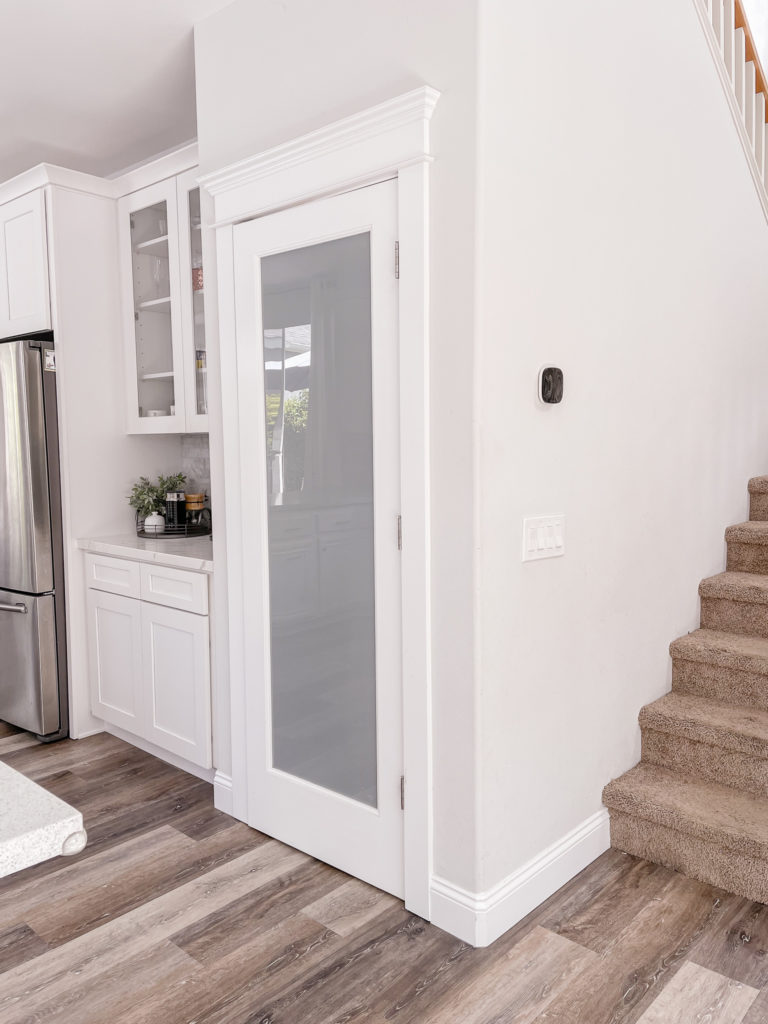
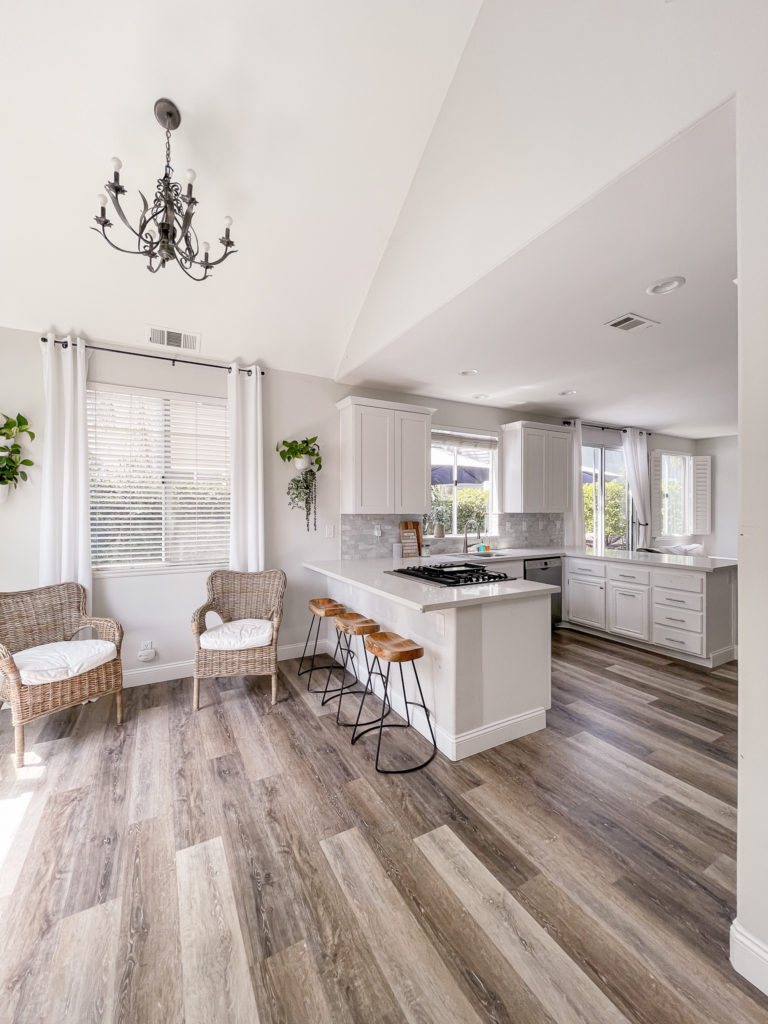
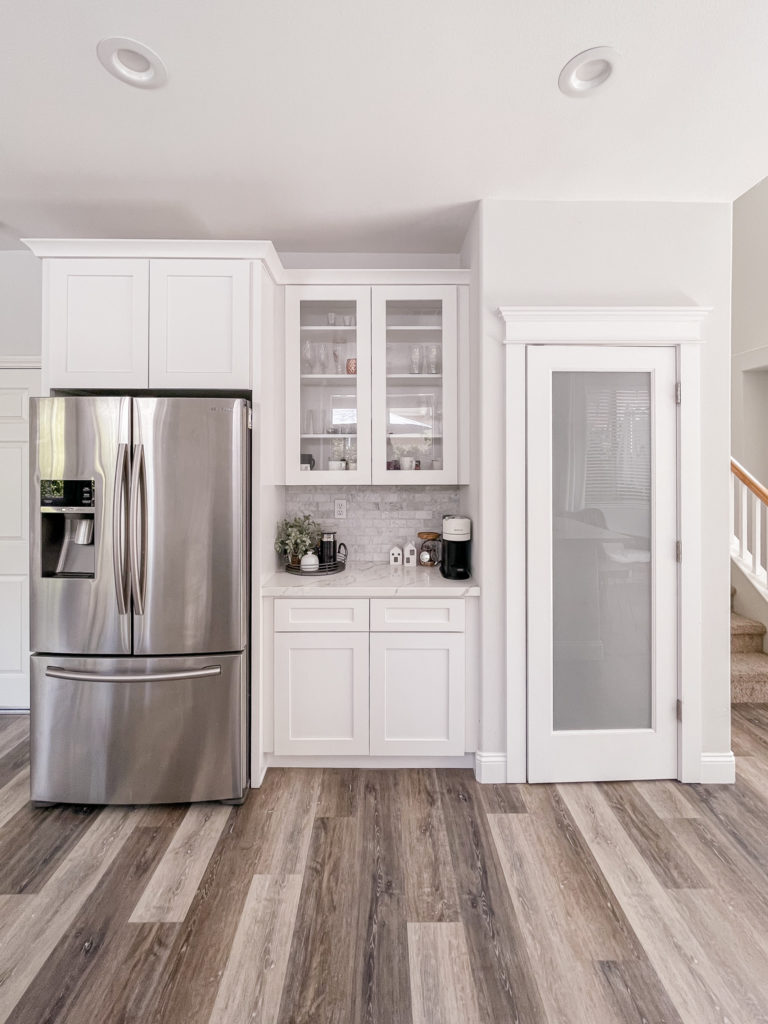
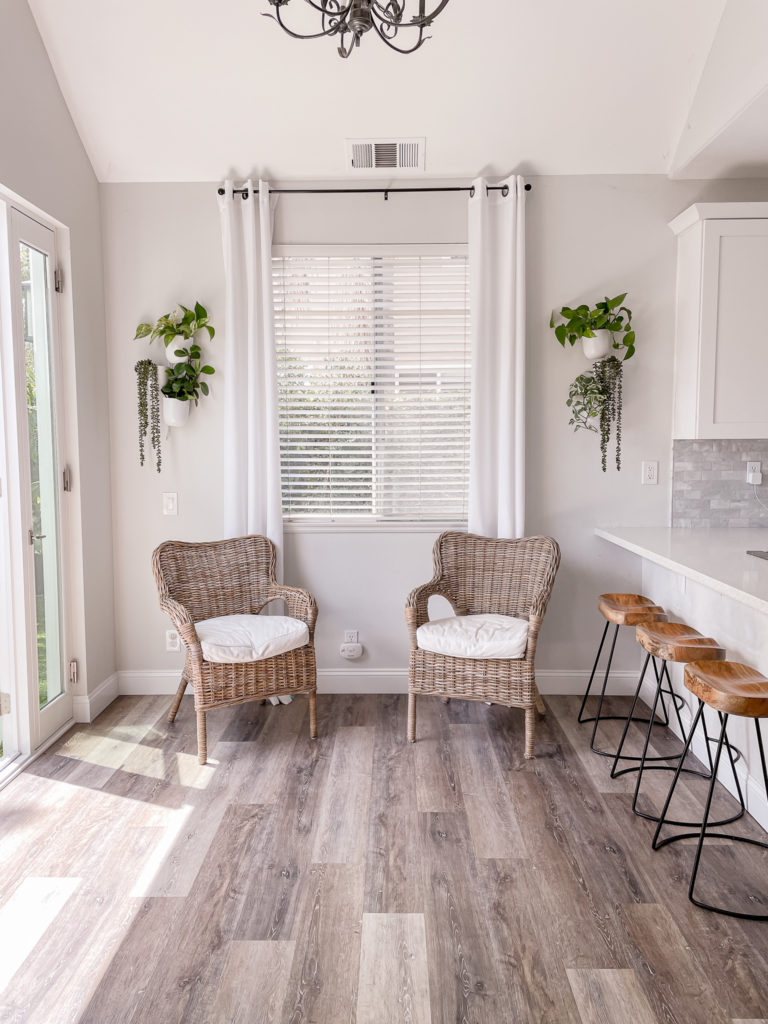
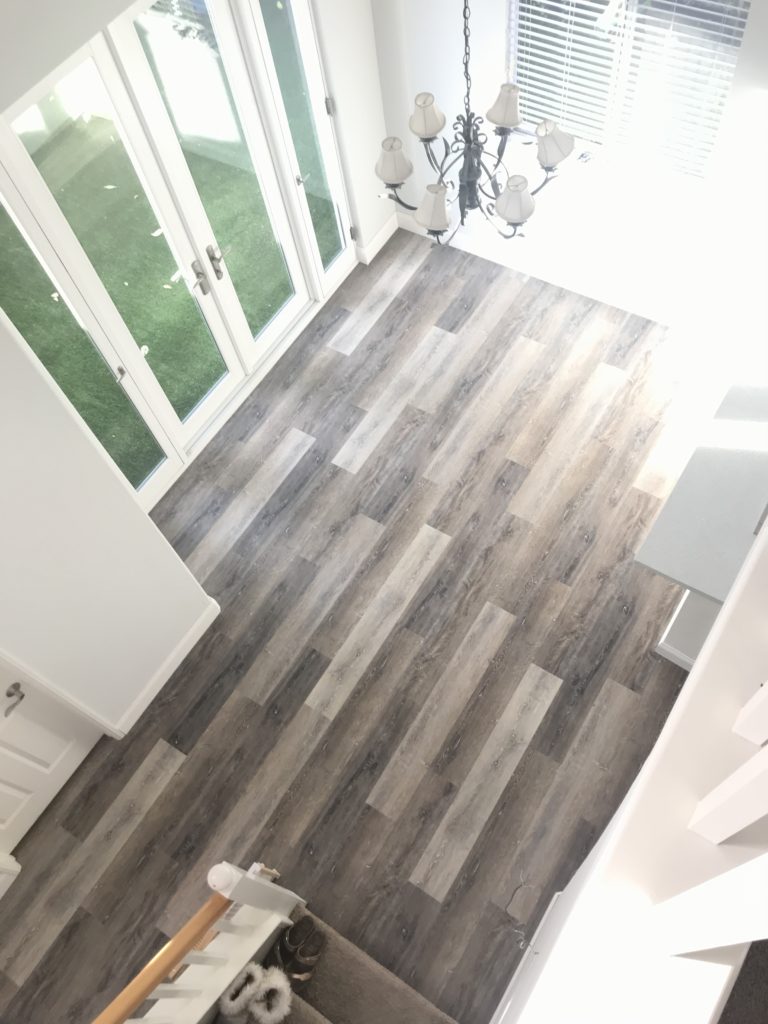
AFTER PICTURES:


We went through these steps during the kitchen remodel:
- Kitchen remodel plans drawn up by Engineer and city approval
- Finding a contractor
- What was done in Phase 1 of Kitchen remodel:
- Demo day
- Plan to reinforce the structure of the house
- French door installation
- Range Downdraft Ventilation System installation
- Drywall, trim, paint, & flooring
Whenever I get a bee in my bonet to change something in the house I always have to mock it up first to see how it looks and feels. I find Sketchup a very useful tool to create 3D renders of your space or your object you want to build. It’s a very easy platform to learn, and the free version is excellent. Here is the 3D render of the remodel I had in mind that I created in Sketchup. It definitely helped us make the choice of investing in the remodel.
Kitchen remodel plans drawn up with Engineer and City approval
Working with an engineer and the city was a very important step in our process. The two walls we wanted to change were shear walls, which offered support for the house. So we had to make sure that taking the wall out in the kitchen and placing the french door where the windows were, wouldn’t affect the integrity of the structure of the house. If we were going to commit to this project and spend the kinda money we were talking about, a structural beam across the ceiling wasn’t an option. We wanted it completely opened up. For us to take down the wall completely the engineer decided to put in a steel structure for support on both walls.
We’ll go more into detail about the steel structures when I get into the plan to reinforce the structure. Once the plans were drawn and approved by us we had to get them approved by the city and HOA. Thankfully this was a smooth process and didn’t take too long to get approved.
Finding a contractor
The best practice in my opinion is to get a few quotes from contractors when you’re considering a remodel, especially a Kitchen remodel. The quotes ranged dramatically, so it was definitely worth shopping around. We had no idea where to start so we got some referrals from neighbors in the community that had got work done to their homes. We did not have plans in hand when we saw these contractors but knew that both walls were shear walls and they needed extra work. The cost of the project obviously factors heavily in deciding which contractor to go with, but a little advice from my experience: you need to get along with them too!
CONTRACTOR A
This contractor walked in with such a grand attitude. He dismissed our ideas and tried to change them into what he saw as a good idea. He made out as if the job was almost impossible but they could do it because they were a huge professional company that could take care of all facets in-house. I quickly didn’t gel with this contractor and that is half of the equation when looking for help with projects. I didn’t dismiss everything at first, I thought I’d see what the quote came in at. He did promise the project wouldn’t take long, and I wanted it done quickly and efficiently. Unfortunately, the sales pitch tactics, pressure they were putting on us to sign, and the crazy price they ended up quoting us, definitely killed their chances.
CONTRACTOR B
We really got along with this outfit. They came in without that much selling tactics and were eager to get started. They also were willing to work within the plans. But when it came down to actually getting the quote, it lagged. My husband had to call them a few times to remind them to send us a quote. If it was any reflection of the timely manner they’d complete our project, it wouldn’t be done anytime soon. They were in no rush at all.
CONTRACTOR C
We had got this contractor’s referral from the engineer we worked with. If you ever have a project like this and work with an engineer, ask him if he has a referral. I think it’s a great idea, especially if they’ve worked together before. It gave us confidence that the plans the engineer had come up with would have no hiccups or conflicting ideas from the construction side. Contractor C came into the house and respectfully assessed the project, didn’t over promise, didn’t try to sell his services so hard, and got a quote back to us in a timely manner. His quote didn’t come in the cheapest, but we thought it was the best fit for us. Throughout the whole construction process, he was hands-on, very hard-working, and had an incredible team to do the electrical, drywall, painting.
What was done in phase 1 of the Kitchen remodel
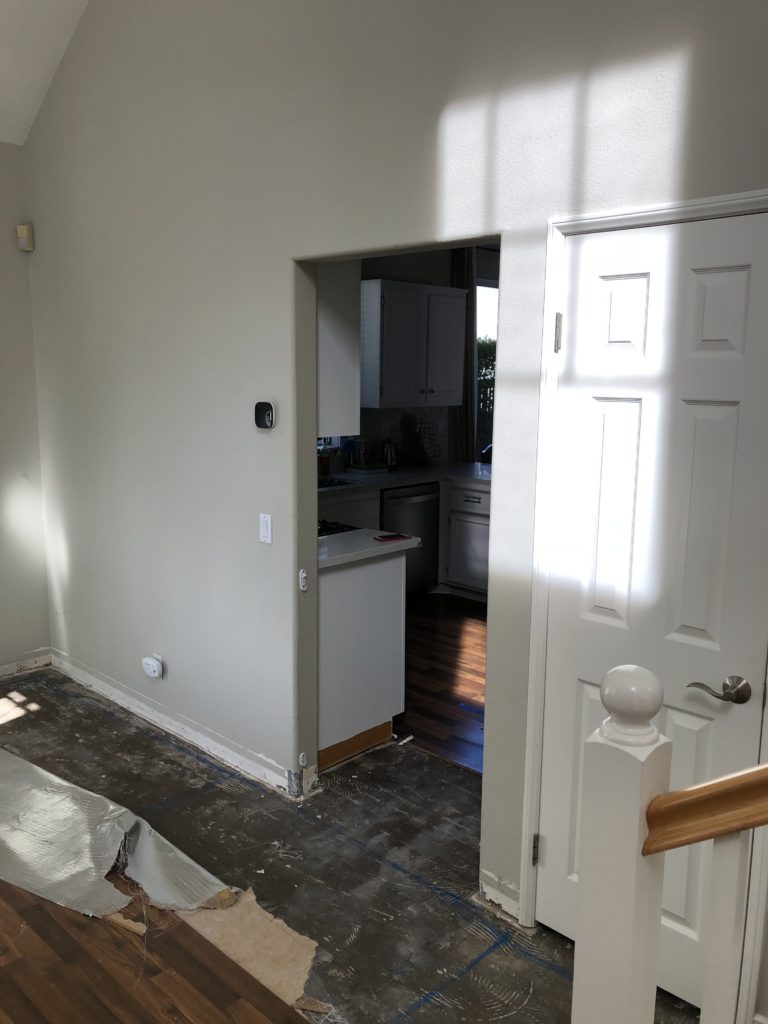
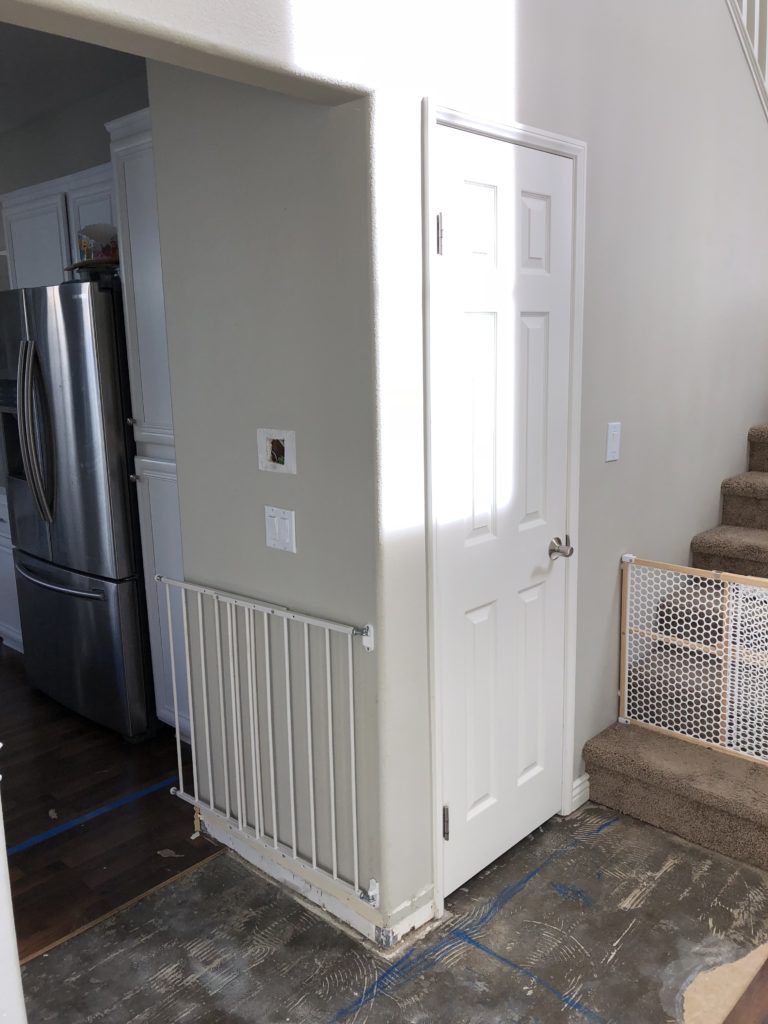
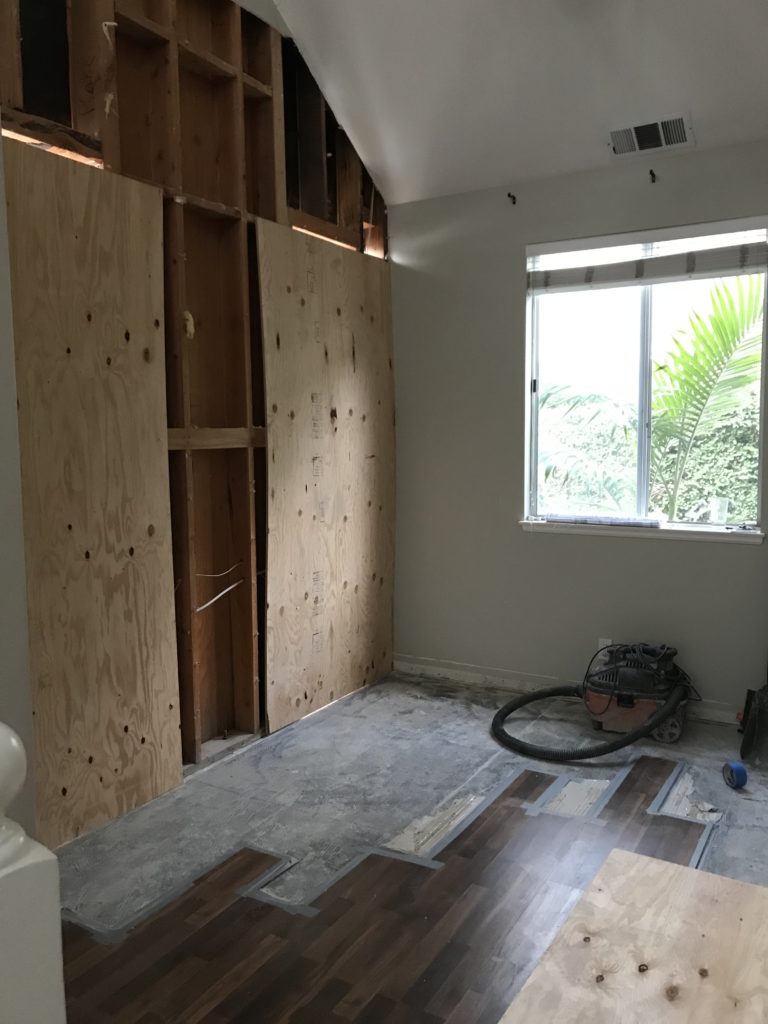
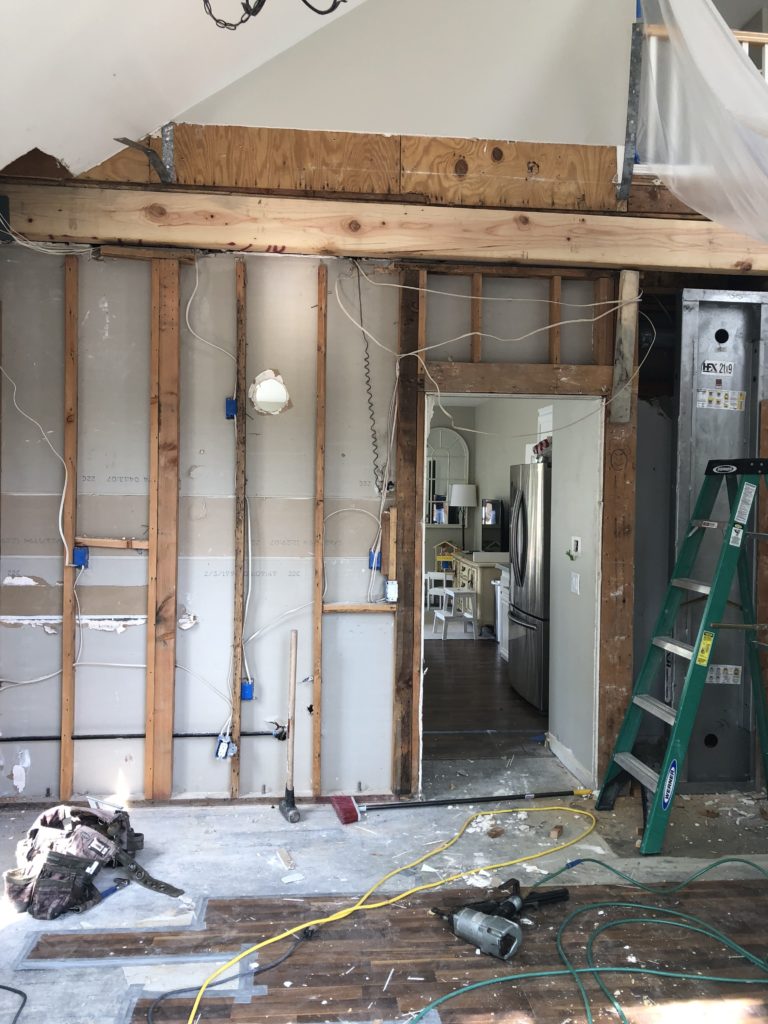
Demo day
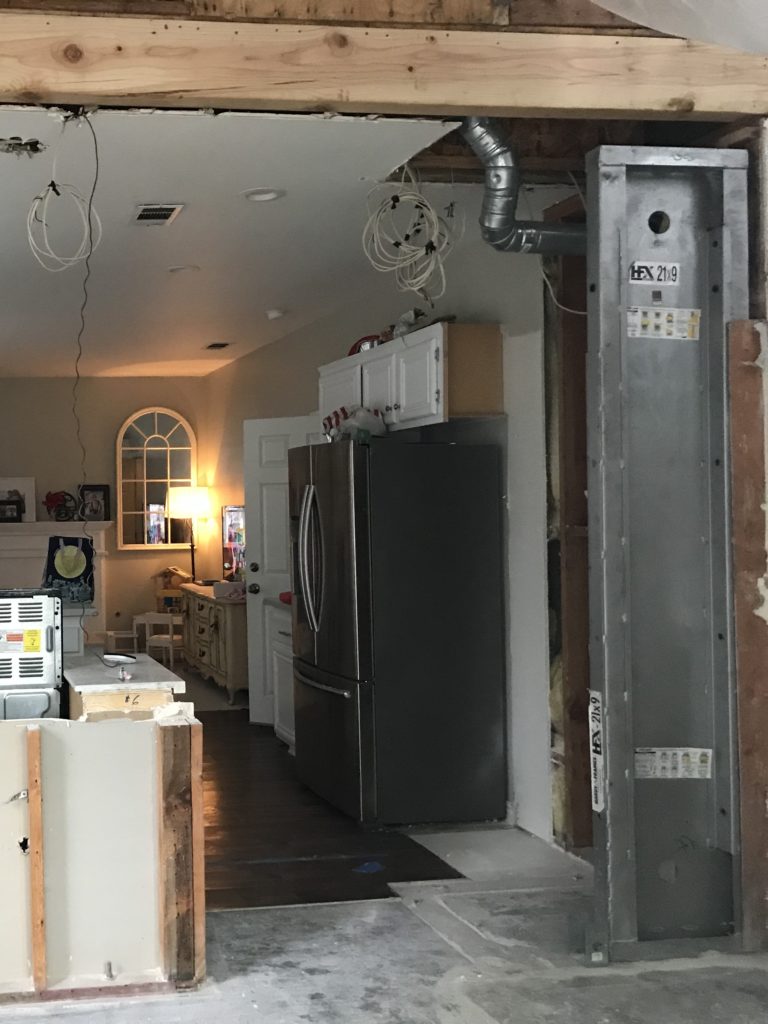
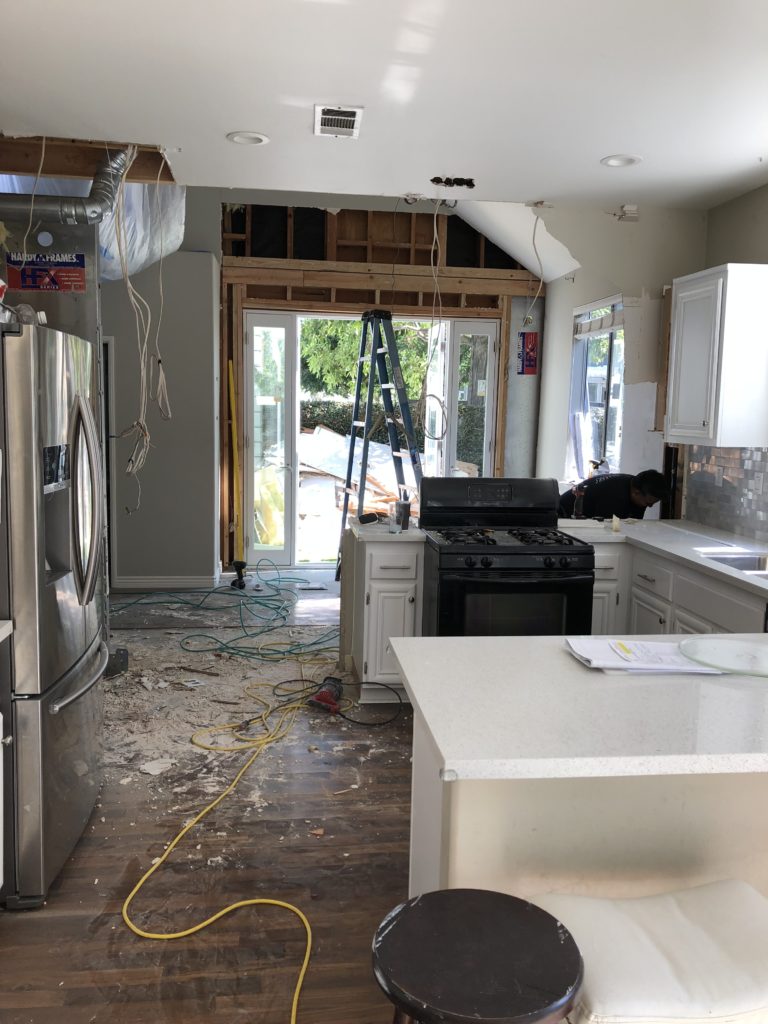
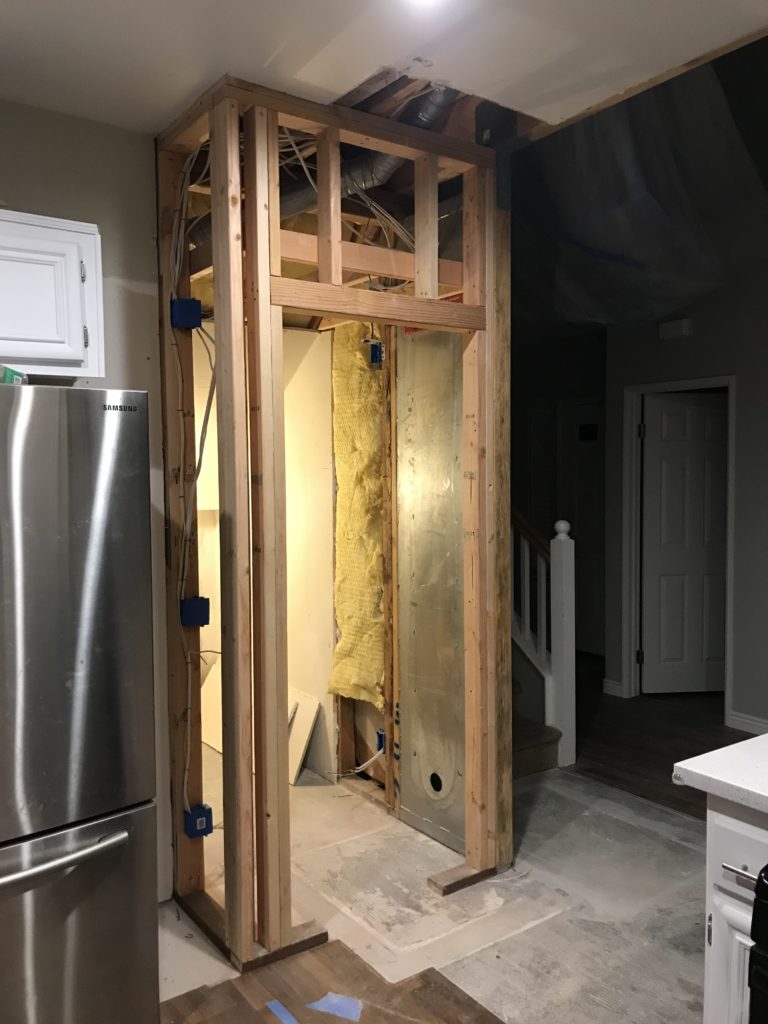
Demo day came and the first thing they did was open up the walls to see what was going on inside of them. SO they ripped most of the drywall off the walls exposing the studs. They removed the windows pretty quickly and then had to reinforce the walls.
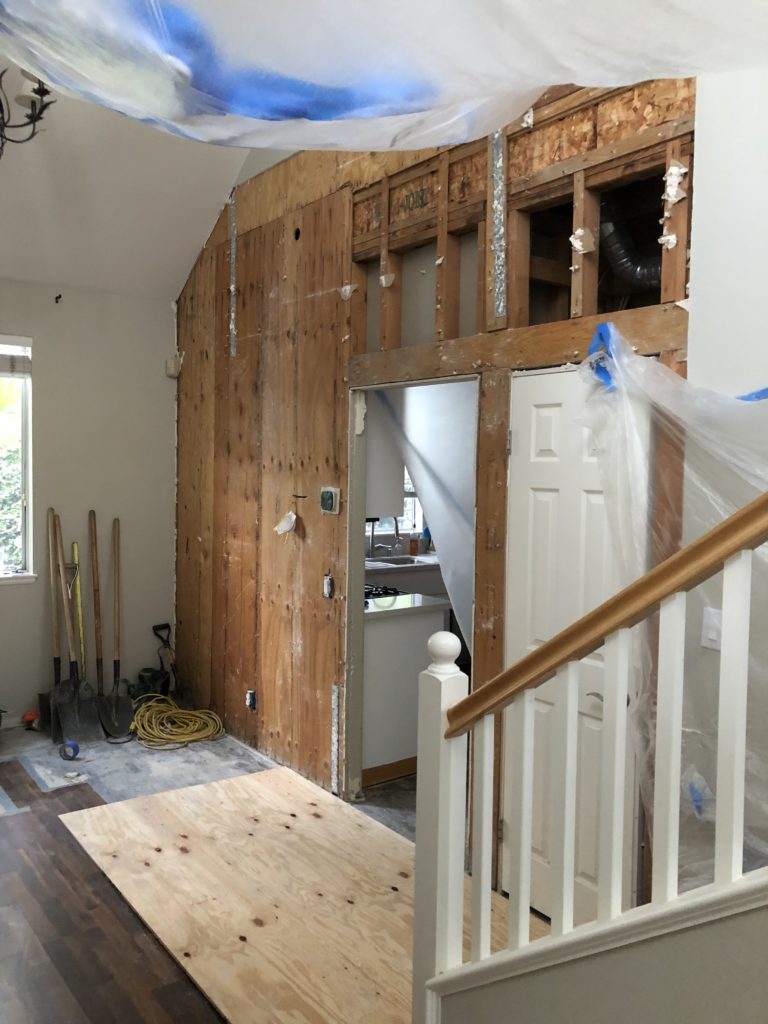
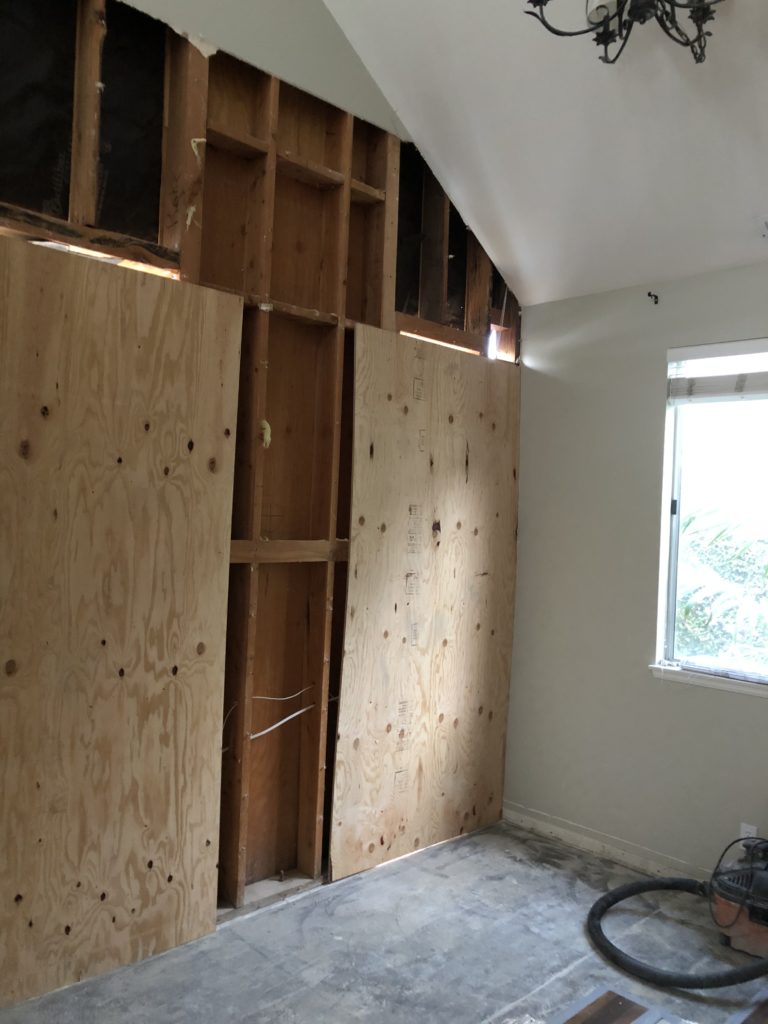
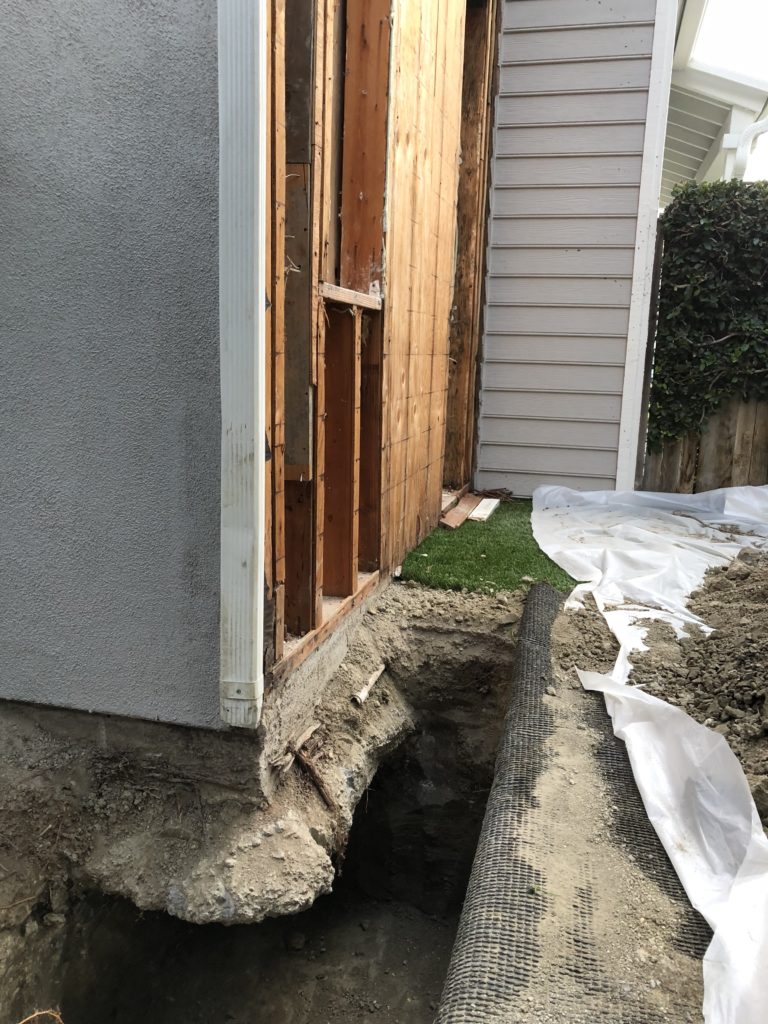
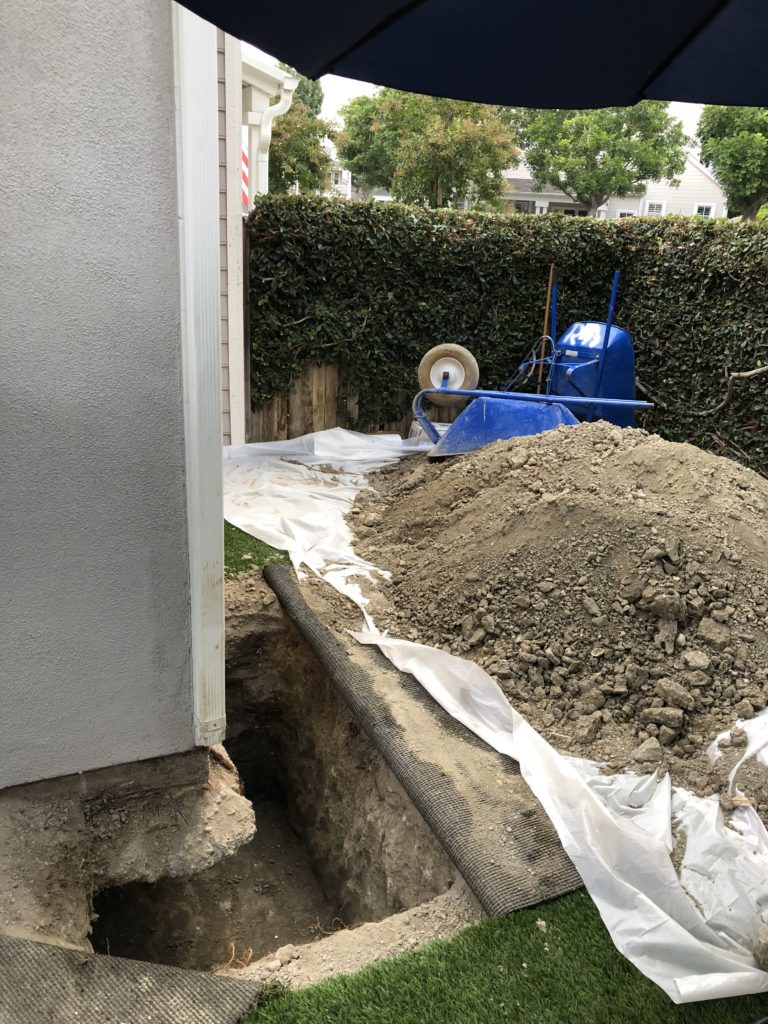
Plan to reinforce structure
They dug two massive holes. One at the base of the stairs that went into the foundation of the house. And another one outside in the garden at the corner of the house. They dug almost 5 feet into the ground. The plan was to sink a steel structure into the holes, fill it with concrete, and then secure the steel structure to the support beams in the wall.
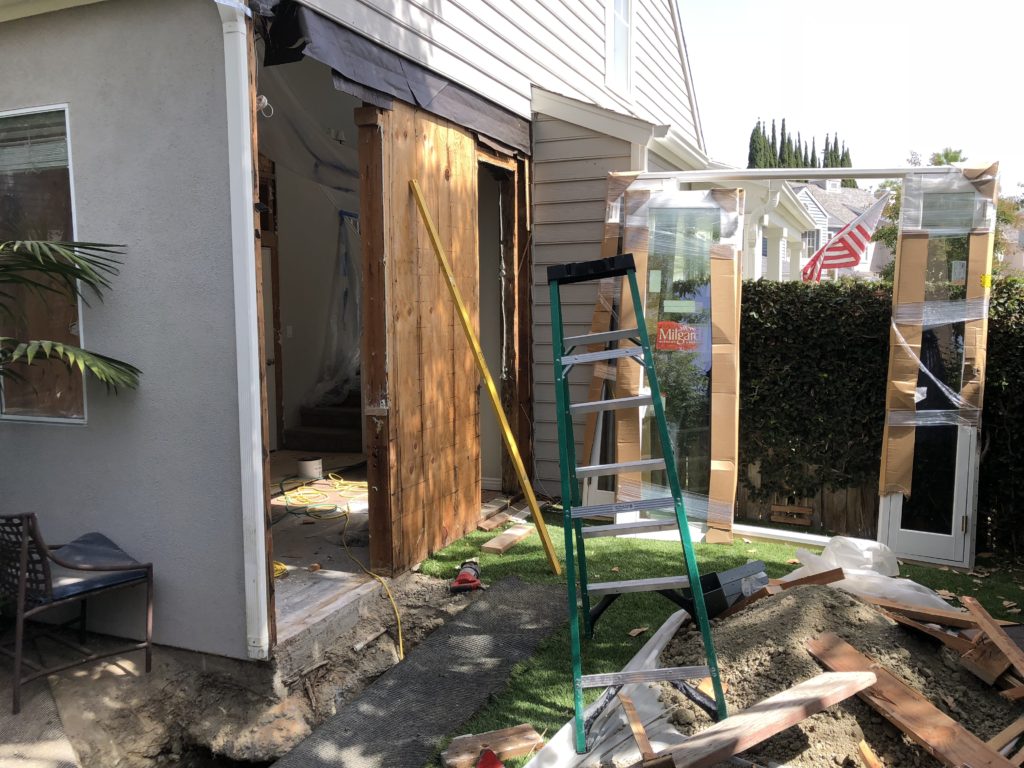
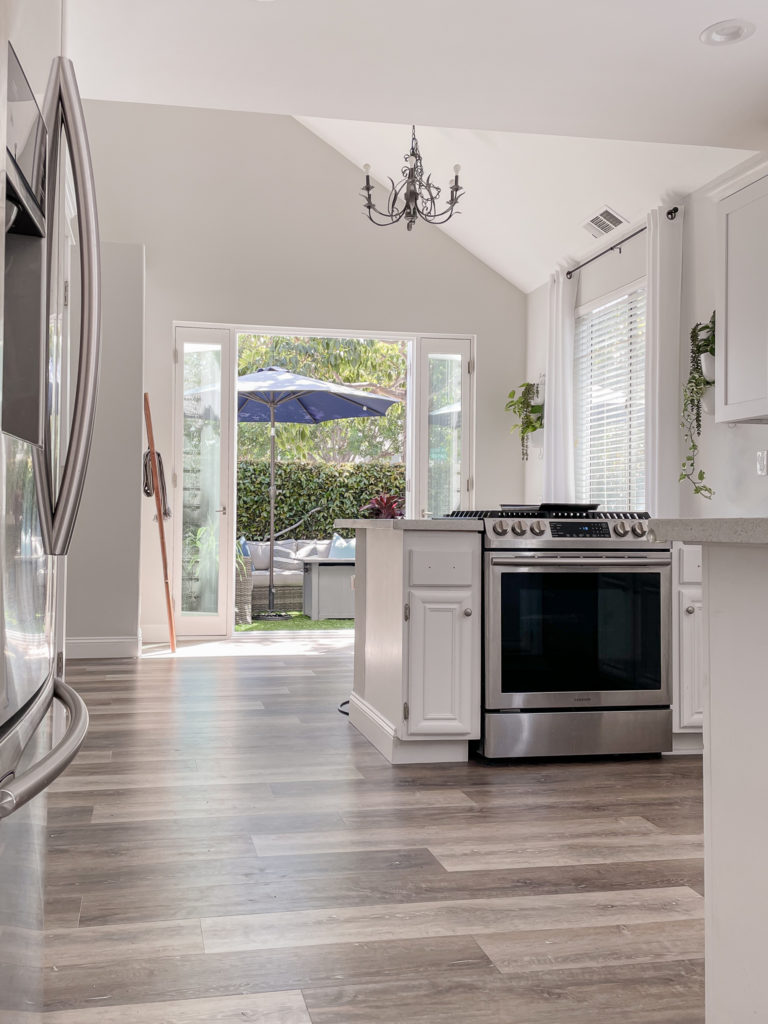
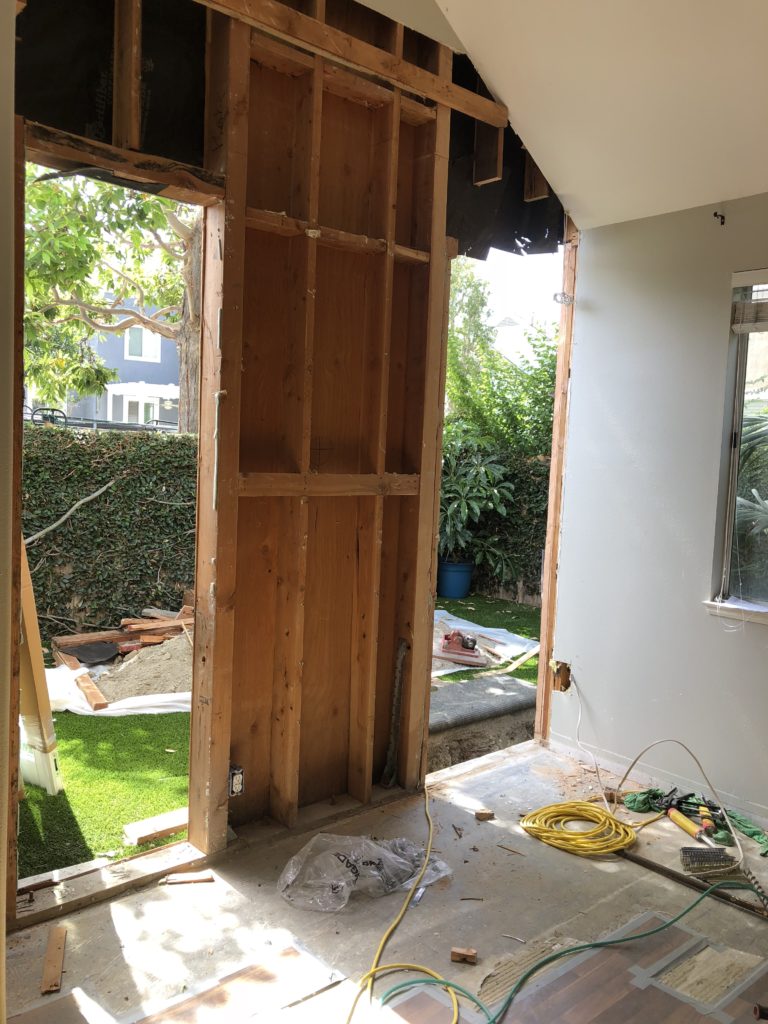
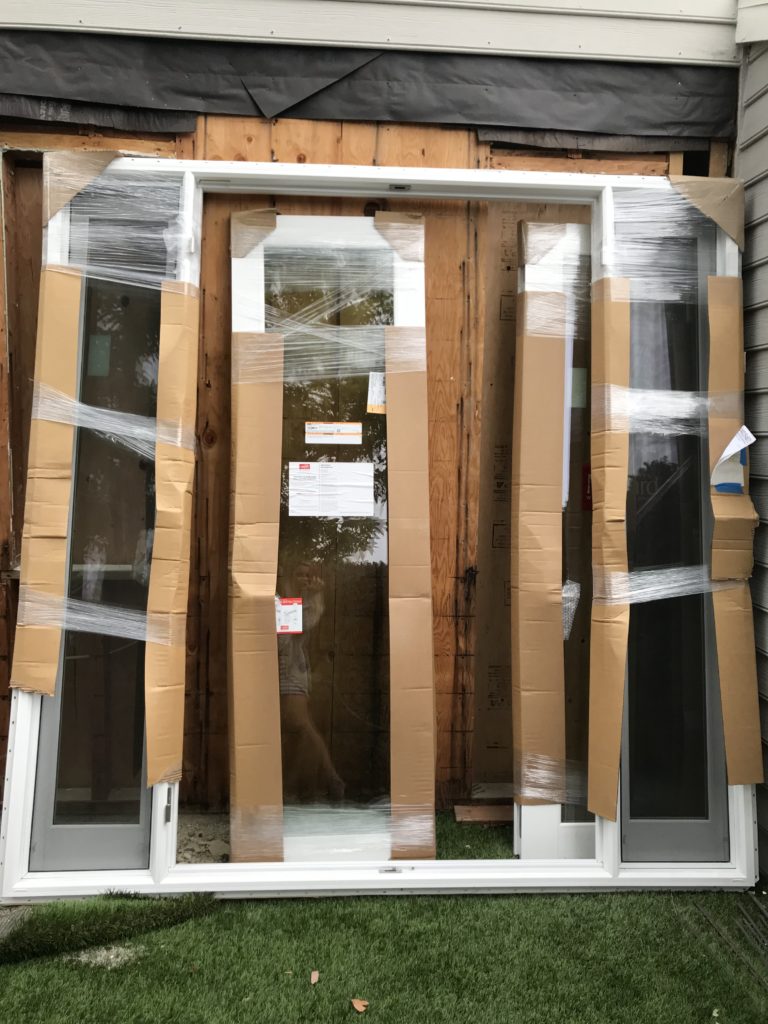
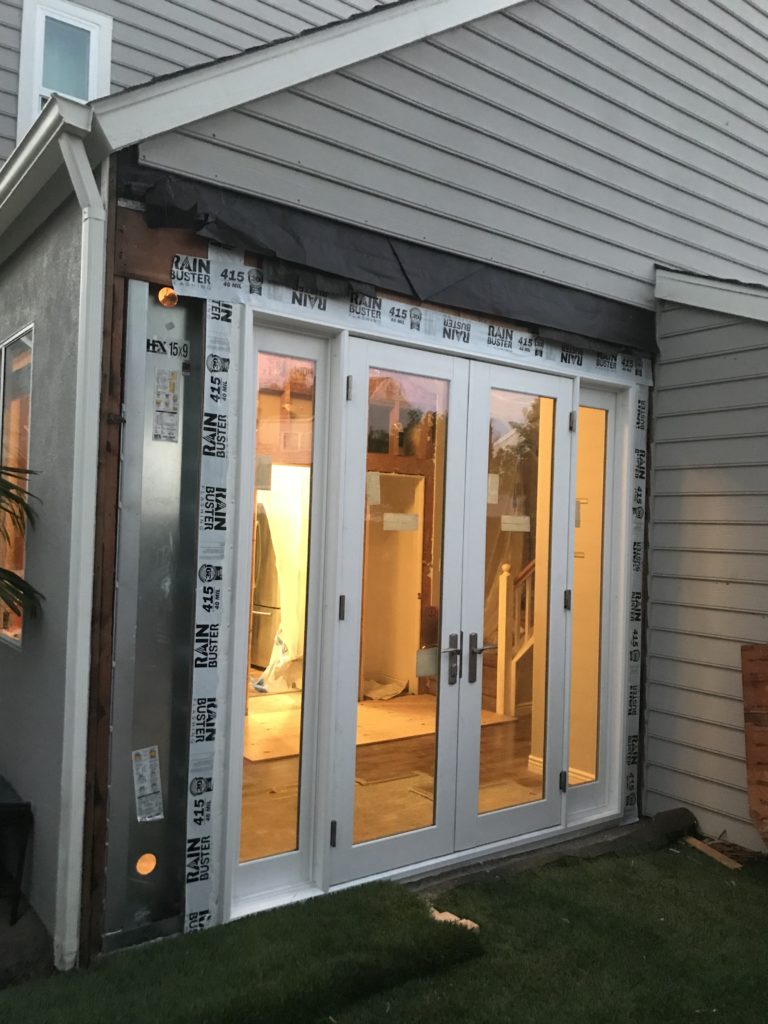
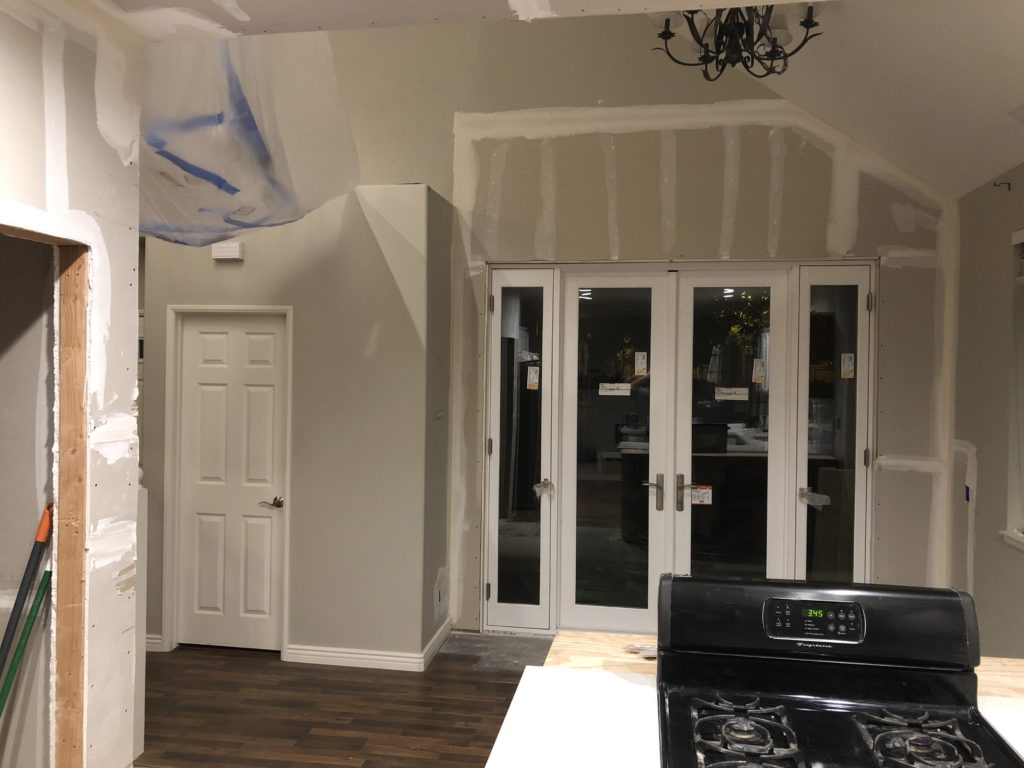
French door installation
Next in the Kitchen remodel was the french door installation. We shopped around for french doors and we found this one at Ganahl Lumber in Laguna Beach made by Milgard Windows & Doors. Ganahl had a nice array of doors to choose from, and had a choice of hardware too. They offered delivery so we lined it up for when the contractors were ready for it. It seemed like the easiest installation. Before we knew it the French door was in, the wall was down and the coat closet was removed. All within a week! After all that was done, it was time for the inspector from the city to come and inspect and approve the project so far. All went smoothly thankfully.

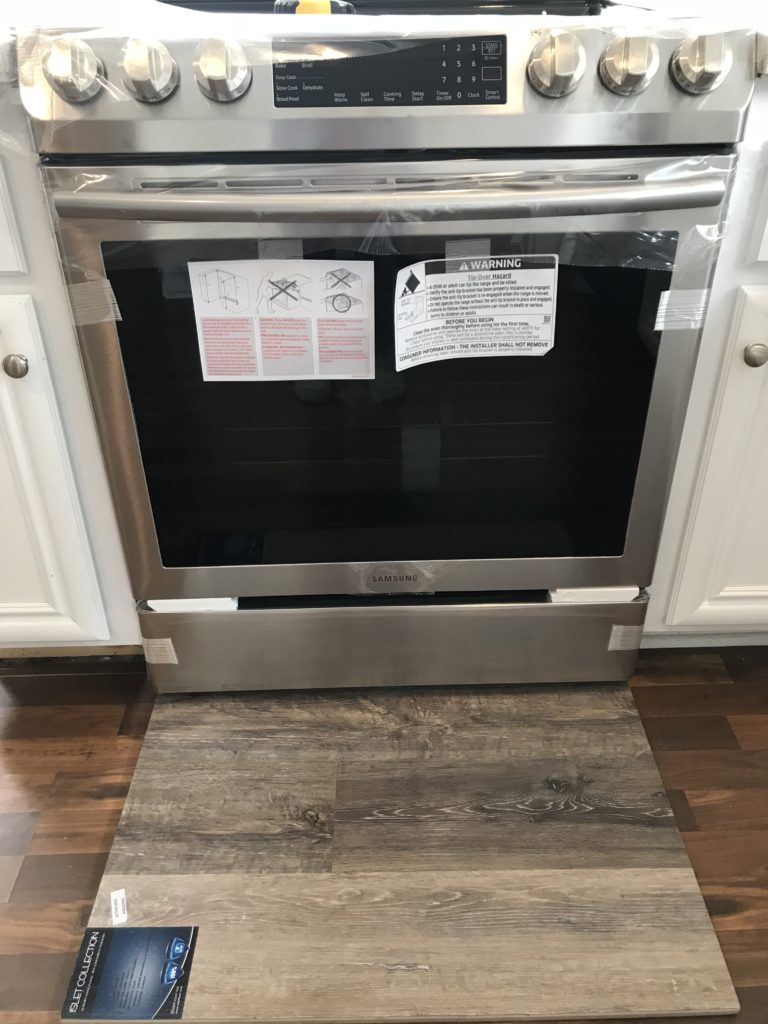
Range & Downdraft Ventilation System installation
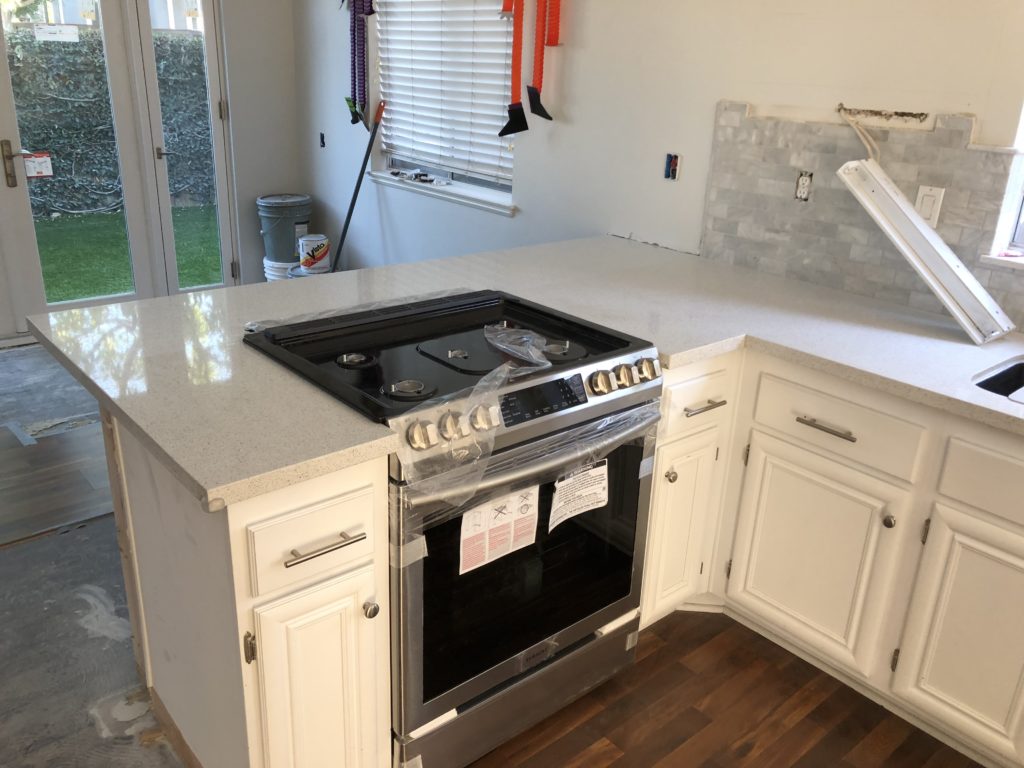
After the inspection, in the following week they built up the pantry, the island behind the range, and drywalled everything. It was time for the range and the downdraft fan to be installed. We opted out of having a big hood filter above the range because the main reason to take down the wall was to open up the area. Unfortunately by Californian code, you needed a vent system. So we found this very cool downward draft vent by BEST Range Hoods, that solved the issue and it worked well with the range we had our eye on. It looked pretty high tech too. The range we chose was a Samsung Slide-in Gas range.
So now we had this sleek metal vent pop up when we needed it, it was quiet, it had a light, and it had a sensor on the filter that let us know it was dirty. You clean it yourself very easily with soap and water. Once the range was in we had the kitchen guys come in and install the quartz over the additional counter they built behind the range.
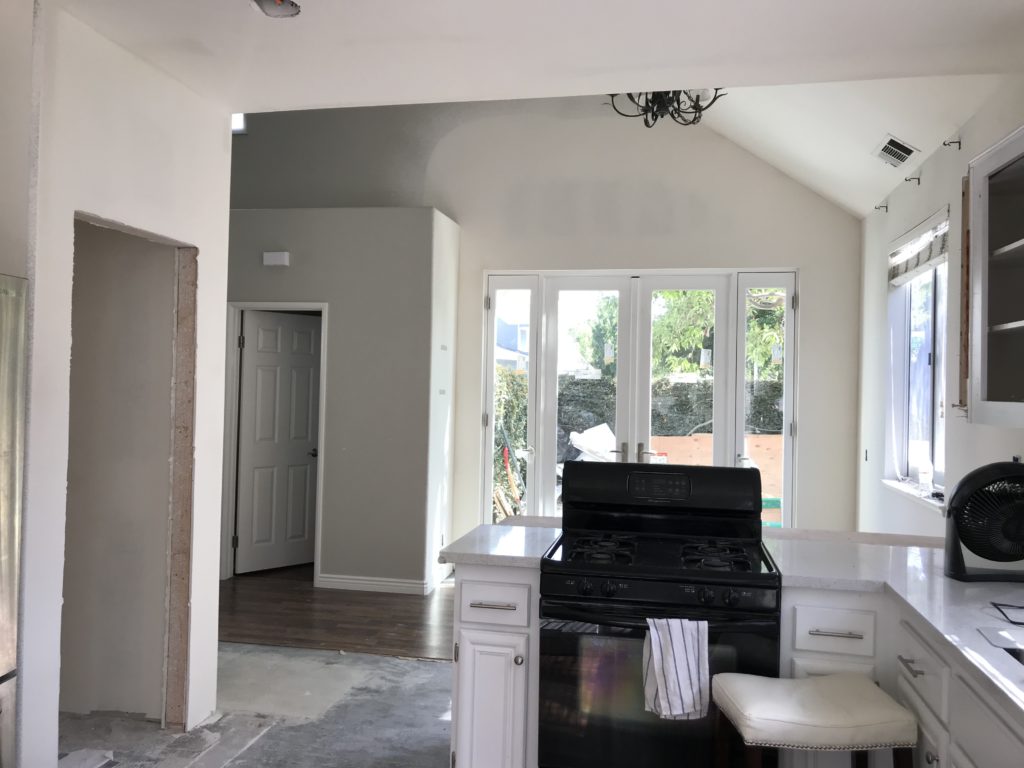
Drywall, trim, paint & flooring.
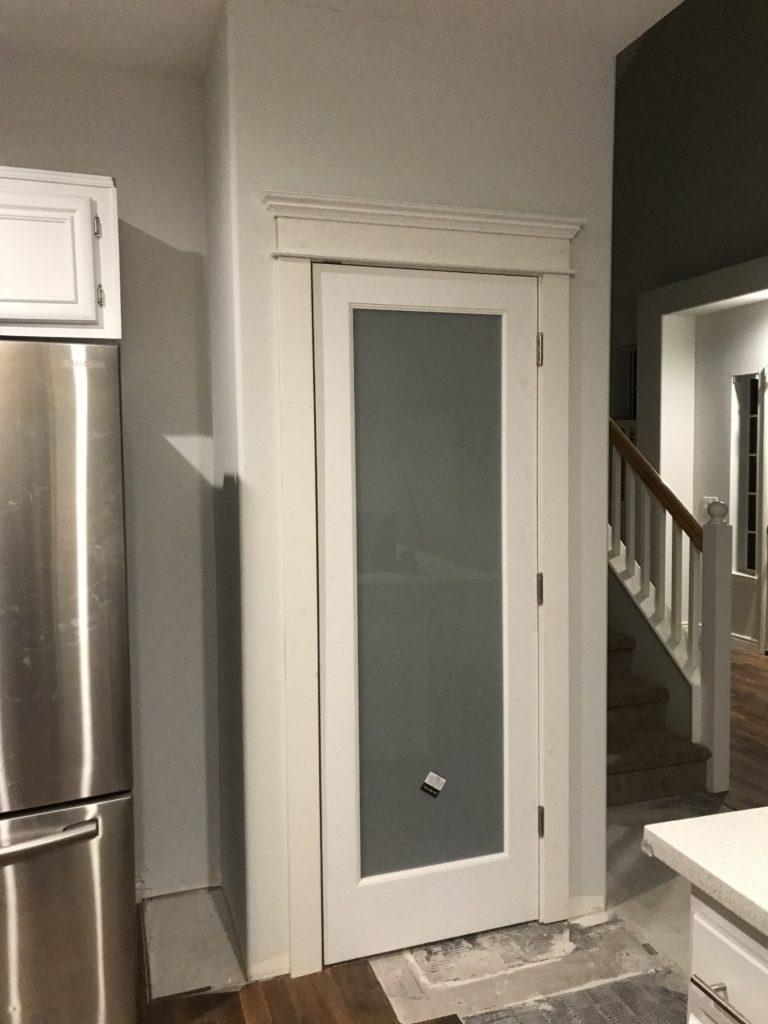
And finally it was time for drywall, trim, paint & flooring. We chose Grey Owl by Benjamin Moore, but we lightened it by 50%. It was the most beautiful grey color. Light enough to keep everything light and bright, but dark enough to create a little contrast for the white wide baseboards. The pantry door we chose was a simple and elegant design, so I wanted the trim for the pantry door to be somewhat of a statement piece. We made it up by adding a few trim pieces together that we found at Ganahl Lumber too.
The flooring was a tricky one. We stopped in at our local flooring store and brought home samples of colors we thought we would like. They ended up being too grey and muted. It definitely is worth taking large samples home or even buying a box to see what it looks like within your home. We went back quite a few times and settled on a luxury vinyl plank in the color Lighthouse in the Islet collection – which is now discontinued. A little tip: buy a couple of extra boxes in case you have leaks or repairs in the future. If the flooring discontinues you’ll be in a tricky situation.
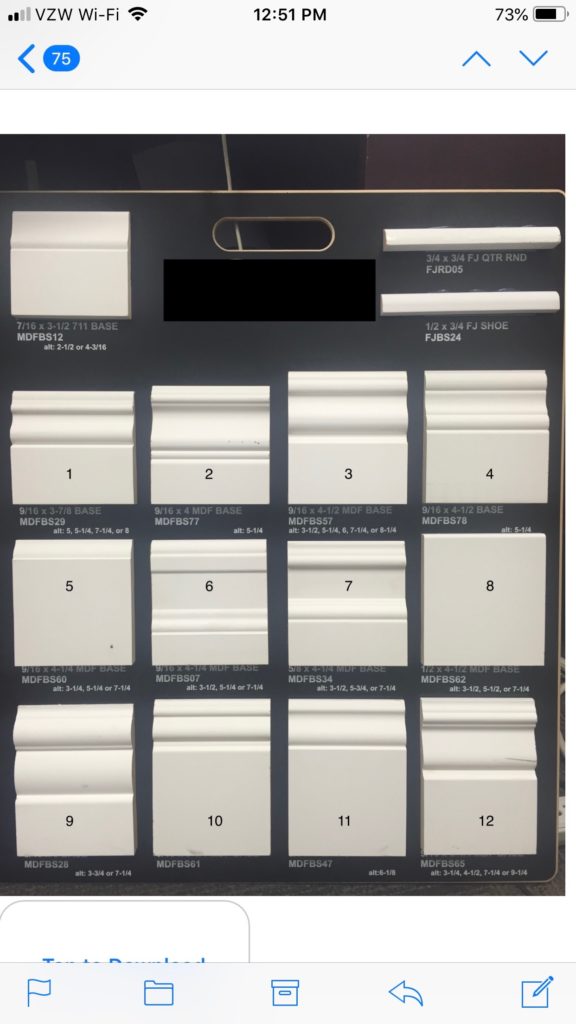
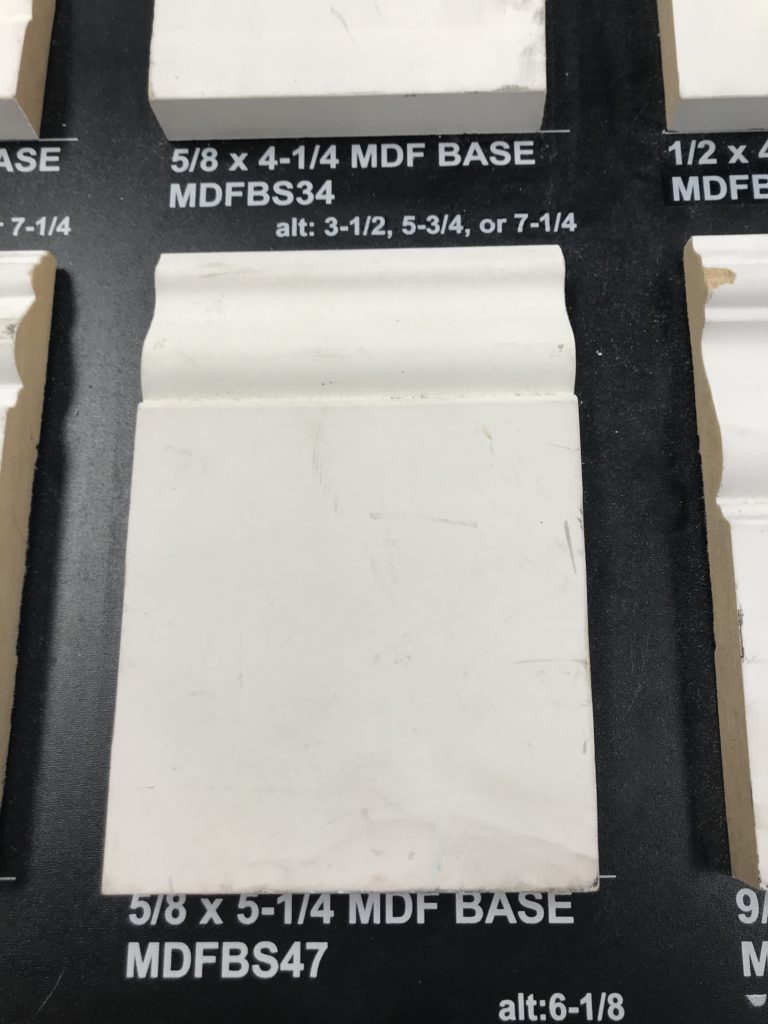
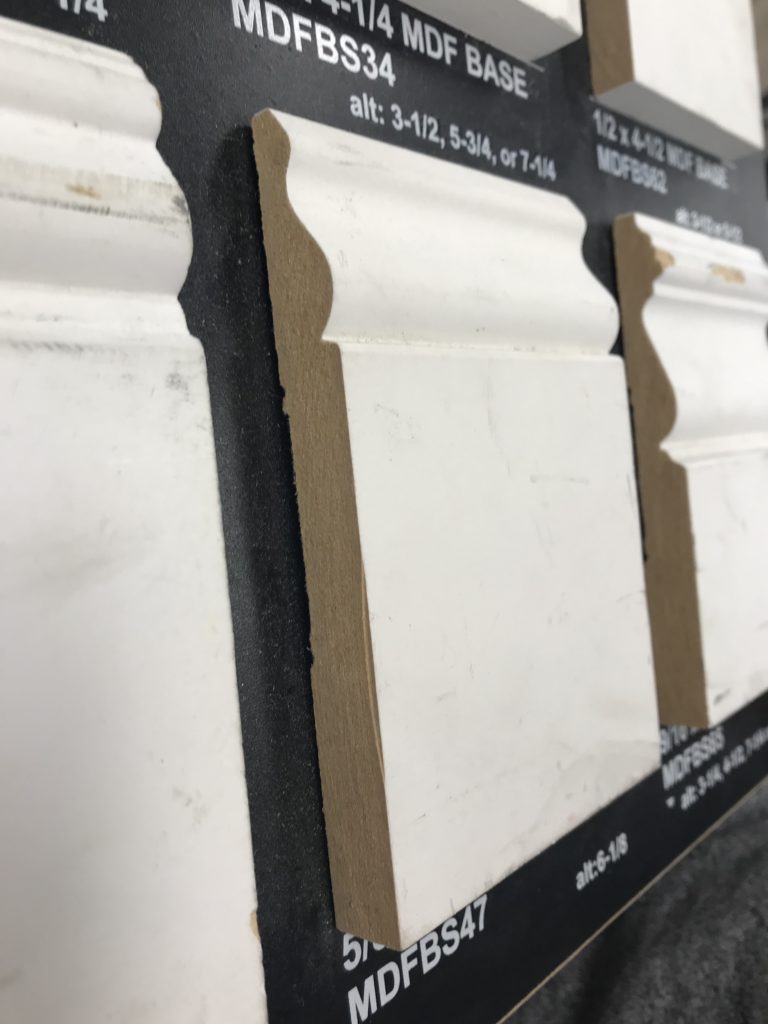
We had a selection of baseboards to choose from at the store where we bought the flooring. I decided on a wider board because I loved how it looked with the vaulted ceilings. There’s just something elegant about wide baseboards, don’t you agree?
What’s to come in Phase 2 & 3 of the Kitchen Remodel…
Stay tuned for phase 2 where I design and build up the inside of the pantry and style it. After that, phase 3 where I paint and reface the cabinets on the lower units and add hardware to all the doors and drawers. Follow me on IG in stories for more details on the upcoming projects. For now, go check out the recipe I tried on my new range: Artichoke Spinach Chicken Skillet.